March 31, 2011

Mom's Hair Cuts


When you were a child did your mom ever cut your hair? I'm talking bangs that spanned half way back your head or the bowl cut? The cut that gets shorter and shorter in an attempt to even it out? I remember all these cuts and a few more.

 Can you even believe this cut? If you look closely you can see a layer of hair below my ear where the hair poofs wildly to the right.
Like steps: bangs, layer below ear, long layer.
As a child I swore I would never do this to my own children. I promised myself and my future spawn that they're looks would be as important as my own and that I would never use their heads as a teaching tool for myself, or an experiment, or an exhibit of my laziness.

Then two days ago it happened. The boys got out of the tub and they could barely see from underneath their bangs. I grabbed some scissors and went to town.


But now I feel terrible. I broke my word. I made a promise and didn't keep it.


BEFORE:
Alfalfa?
BEFORE:
I told you, he really couldn't see.

AFTER:
Beau obviously traumatized and trying to hide it my acting like he's engrossed with his treat.
AFTER:
Chewy is literally crying with shame and simultaneously glaring at the camera.


Naturally I tried to justify my actions. 
They couldn't see! 
Their eyes begged me for help. 
There is no way they could look worse, I said to myself. 
I assured myself, they wanted me to do it.
"They will love it" I say to no one at all.

 I obviously tried to simultaneously assuage my guilt and buy back their love with rawhide bones. Shameless actions indeed.

But let's be honest for  moment, shall we?
THIS USUALLY COSTS ME 90 dollars!!

CHEAP OR FRUGAL? YOU DECIDE

March 30, 2011

Diaper Cake


Originally I decided to do a tower of cupcakes for the centerpiece on the refreshment table. Then I saw this gorgeous photo and I decided that I need to have that as my centerpiece. That left me with a tower of cupcakes for one side of the table and a pitcher of branches for the middle. I really needed something else substantial to balance out the other side of the table. I was thinking a diaper cake would give good height and would double as a gift.


Now I know I'm going to make one, I just have to figure out how! I turned to the internet for ideas and inspiration.

This will be the inspiration "cake". There's a ton of different ones out there, but this is the look I'm going for. 
I like the how colorful it is, how there's no crazy toys hanging off and how you can't see the diapers. But I seriously wish I had a cricket, people!


I know I want to work in the theme stickers I've incorporated in so many other places and probably the pennant card stock as well. I'm certain I will be using the same ribbon again because  these choices will make for a cohesive table without adding any extra cost.

All this planning ahead of time helps me to find the best deals on materials and ensures the table will look awesome with just the right amount of refreshments and embellishments.

Really though, doesn't this seem like a of of extra work just because I fell in love with this centerpiece? But not once did I consider ditching this new idea!

March 28, 2011

✥ Shopping for Parts ✥

Phase two of the headboard DIY project...the materials hunt!

 I  outlined the list of materials I was looking for.

I know I need fabric and a lot of it. Those of you who have purchased fabric know it can be really pricey. I did go through a few local fabric stores but could not bring myself to pay the large price tags for the thick velvet I already decided that I wanted. So I started browsing for curtain panels that worked into my color scheme. I figured this would save me quite a bit and would be exactly the right size I needed for my king size bed.

 curtain panel
The winning panel turned out to be from Target. It is the same brand as all the other linens I have on my bed- Fieldcrest Luxury. I liked a few of my options at other stores as well- most of my options came in at around 30 buckaroos. But the winning panel was on sale for $8, yes $8 dollars!! That's some serious savings! It was the same cream color as my bedsheets and bed skirt. Actually it has tonal striping that matches my damask striped sheets perfectly. Not that I am in love with matchy-matchy- but the sheets barely show with a made bed and I think it will be very pretty.
sheets
The next stop was Lowe's for the piece of wood. Some of the "how to's" online mentioned getting real wood for the headboard, while others went for a particle board. Of course I chose the cheaper particle board- the cost coming in at only 15 bucks.

I also picked up the french cleat that allows the headboard to slide into place on the wall and eliminates the need for legs. That was 15 dollars.

While at Lowe's I walked past the carpet padding and stopped mid stride. I has already priced out the cost of foam and knew it wasn't going to be cheap. So I had the gal quote me on a layer of their thickest carpet padding. The total came in under 20 bucks. So three birds with one stone!

Because the carpet padding is less "squishy" than the foam I wanted to put an extra layer of batting down. I had a coupon for the craft store and almost got two bags for the price of one. Sweet!

The last step was the nail head trim. I really wanted to buy local because I wanted to see the finished project the same day. I was outta luck. The only trim I could find where boxes of 24 nails and they didn't have the huge number I would need. So I had to buy online. I ended up with an ebay seller who took three weeks before popping my item in the mail. I could've killed him and wish I would've paid the extra DOLLAR  to get through a online store! This is when my "fruggle-ness" turns into cheap-ness and I could kick myself.


I choose the french natural color because it matched the pulls on the antique dressers. Although most the metal accents in my home are the more common brushed nickel.

If you're adding everything up you know I'm under 85 bucks for the project! 

Not bad, right? 


March 27, 2011

All From Ikea

I was asked to out together a living room design in a modern aesthetic for a friend of mine. She was starting from zero, as in from scratch. We were working on, my favorite, a BUDGET!

I like working on a budget. It gives a project parameters. It helps you to define where the bulk of your money should go. I am always bargain shopping, whether out of necessity or not. It's kind of like a game and I am the winner when I find a good deal on exactly what I want. Meaning, I don't like to settle with an inferior style or quality just to save money. It still needs to look good, last a long time, and be something you love. Do not bring things into your home you don't love. That's always a waste of money.

Okay, I apologize for the tangent. Back to the design.

To decorate this living room I knew I was going to do mainly from Ikea for two reasons. One: my friend is a big fan of their clean lines and likes the more modern the better. Two: she is not a shopper like I am. I was going to need to find almost everything there for here because going from place to place looking for just the right accessory is not her idea of fun. (Although why not, I don't know?)

My parameters included a $1000 budget, a color scheme of black and red, the necessity for a sofa bed and storage. 

The starting point was supposed to be a very modern, black sofa. But sitting on it just wasn't that comfortable. They look so sleek and stream lined, but when the arms and back of the couch are low and the same height there's no where to rest your head. So comfort won out and I needed to incorporate the tan/beige sofa into my color scheme. This primarily changed the curtains and the pillows, but the walls are already a lighter tan than the couch so it should look great.

At $699 the couch is really fantastic. There is storage underneath the chaise and under the love seat portion there's a pullout that pops up and turns the couch into a double bed. It is also very comfortable and easy on the eyes. We got the curtains to bring more black around the room. It is actually wavy stripes of black gray and tan. The same colors as in two of the pillows.

I choose this bookshelf for her storage problems and the red boxes fit on the shelves perfectly. The bookshelf will actually be on its side and multitask as a room divider. We went cheap on the TV stand- cheap on price but not on style. There's nothing offensive to the senses here.

For side tables I convinced her to go rogue and we left Ikea to get some square storage ottomans. They're black and we got two to act as two side tables for now, but  on a whim they could work as a coffee table or even a bench if she wanted them to. The top can be flipped over and works as a hard surface for drinks or whatever.

That pretty much killed the budget. But think about it, the couch was 700 bucks so we got her a whole living room for 300 additional buckaroos.
We chose a club chair to bring a pop of red to the other side of the room. It was a great price and is actually comfortable. Love. Ikea.
I choose some accessories for her to keep her eye on. We picked out a trendy sunburst mirror and some red lamps. Also her contribution was a vase and sticks that mimicked the wavy lines in the curtains.


I would love to do more in the way of accessories but it's just not her style, she's actually had blank walls for the last 6 years. So I guess it's baby steps and I'll take what I  can get. If it were up to me I would suggest she do one of those amazing vinyl graphics, something like a gray silhouette of an organic shape. Also, some black floating shelves with tan and gray vases or glassware. Then a photo wall with black frames and black and white prints.

This was a really fun project. Personal shoppers and decorators are so lucky. They get to shop all the time and don't have to spend their own dinero. The only challenge is moving away from your own style towards one that will please your client/friend.

Hopefully I can get some after shots to show off my labors!


March 26, 2011

Getting down to Business!

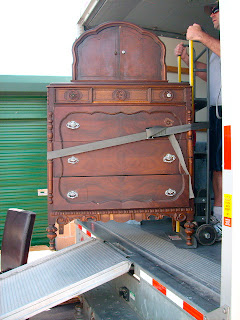
Z and I inherited an antique dresser set from my family that we have been using in the master bedroom. It is very decorative with scrolled wood work in a deep ebony brown. We love having it mixed in with all the other modern elements in our home. But, it has prevented me from having a headboard for years because nothing really matched.


I decided to get an upholstered one a while back but my cheap fruggle nature prevented me from spending the $300+ to buy one when I knew it couldn't be that hard to make one and I bet I could do it for under 100 bucks.

So first and foremost I started my search. Which ones do I love and what would I want mine to look like.

I decided that a rich fabric would best compliment the ornate dressers, so I was leaning towards something like velvet. I liked the idea of nailhead trim- I thought it would boost it out of the "I did this at home" look and into the "of course I paid a ton of money for this" look.
Urban Outfitters- Modern Velvet

CSN.com

Now I know there's a ton of info online of how to make your own headboard, mostly because that's how I'm learning how to do it!

But I think I will primarily outline my budget saving ways and gloss over the stuff you could find anywhere. (As for the how to, I really liked the info I found on centsationalgirl.com )

So- the list of things I will need to buy:
wood
fabric
batting padding
nailhead trim
hanging apparatus

Let the search begin!

March 25, 2011

Shower Goodies

Today I'm getting the invites out for the upcoming shower. The shower I'm planning if for a friend I've worked with in the nursery at my church. The shower is for her church friends only and 30ish people are invited

A few weeks ago I did a plan for the shower and made an exhaustive list of things I'd be looking for. This way I would have it on hand no matter where I am I'd be prepared. This helped me take advantage of some great sales, especially when I wasn't out shopping for the shower specifically.

Z and I were at Pier 1 looking for lamps, of course, and found some incredible deals for the shower instead!

I was brainstorming how to do gift bags for under a dollar a bag/prize. I couldn't find a better deal than that in all my searches but I kept coming back to a pack of white paper bags I had purchased for when I was working in the nursery ( hand puppets.) Then last night my search for ways to make these very plain bags cute and decorative brought me back to my favorite baby shower inspiration blog, bumpsmitten.


Not bad right? I'm pretty sure I could do something like this and have them turn out dang cute.


March 24, 2011

Remove Water Stain from Wood

One of the only things I like more than finding a good deal is making making something I already have better.

Or in this case fixing a blemish. We have a dark wood table that got a nasty white heat stains from a very hot pot of Grandma's famous spaghetti sauce. I didn't even realize this could happen, but wasn't too worried when I saw it because I figured Murphy's Tinted Oil would fix it right up.

There is a glare that makes the damage look worse than it is. Thank goodness.


It did lighten the mark- or rather darken the mark a little. But you could still see it. Then I was blog hopping and ran across someone with the same problem. (although I didn't mark whose blog it was- whoops) She said to place a cloth on the table and then apply an iron on top of the cloth over the affected area. It could take between 2-5 minutes for the spot to disappear.


Looks pretty great right? It only took my table about two minutes to get rid of the mark. I did it for about a minute then checked it and then checked after again at thirty second intervals- just in case!

March 22, 2011

Dollar, Dollar Bill-Yo

Well, you may have  noticed that I am looking for new couches. But the search has lead me in a direction I wasn't really planning on. I think I am moving away from the color scheme of warm tans and greens that we've had for the last 6+ years and moving towards a more modern pallette.

I think I want to incorporate greys- in the form of draperies and a sectional. With more vibrant pops of color. I do love the muted and calming colors I have had in the past, but think The Bergs may be in need of a change. Pops of bright yellow or turquoise maybe?

Have you seen younghouselove.com?

I browsed through some of their mood boards and focused in on the ones that draw me in.
You know how you just respond to some colors?

I like how gray is the new tan. It seems like a more sophisticated  neutral pallette.
I like the bright green, but can't seem to shake the idea of yellow and gray.

And can you believe this turquoise? I'm not sure if I'm brave enough to do it.


So the next step is the budget and of course lots and lots of internet browsing.  Since this make over is going to cost more than I had originally thought I had to come up with a way to fund my makeover. I finally decided to sell some of our older stuff. We are terrible at actually getting old items listed  and sold. Now that my motivation is a new living room this is a different story.

I've listed almost $2000 worth of stuff we DO NOT USE on a local website (KSL Classifieds)  and have already made $180 on my Blackberry, $35 on a framed backpack, and $135 on ammo Z didn't like.

I think I'm in love with this process. It is totally worth the time and I make way more than if we'd had a yard sale! Yes!

By the by- Remember the couch I was inspired by? I saw one in the same shape when I was at Ikea this week.  It also comes in a great blue-grey.

All in all, I'm looking for  a couch, chair(s), lamps, curtains, coffee table or some alternative and probably some new accessories.

March 15, 2011

It's Baby Time!

I've been working on putting together a baby boy shower for the last few weeks. I did a lot of internet image searching for inspiration, then saved all the pics I liked. I want the shower to look professionally done and my goal in every endeavor is a lot of bang for my buck.

I made a list of all my possible ideas and then my next step was to hit up every craft store in my area. Over the past few weeks I've checked prices on each decorating possibility, at each store, and then looked online to quadruple check for good deals.

I've been really inspired by these images. 
Image from bumpsmitten.com
image from bumpsmitten.com


Things I love include the cohesive color scheme, simple and classic platters, the banner,  minimal food choices that look amazing and yummy, and the small details that make this look over the top.

So I adopted these starting points and made a color scheme of navy and turquoise with pops of golden yellow. I developed a theme, it will be "a star is born". Made some smart menu choices that will mimic the look of my inspiration tables. Then went crazy at the craft stores buying the best priced items I could find.

One of the most important choices you can make is decorations. I pulled my inspiration from this  baby girl's shower photo.

image from bumpsmitten.com

 I cannot wait to make my own Martha Stewart inspired "puffs" for over the table! She has a full tutorial on her website. I founf colored tissue paper that make each "poof" or "puff" only a dollar!

You may be noticing a theme from my inspiration photos. They all hail from a fantastic website that provides ideas for every budget.

I can't wait to post updates on this topic. I will be working on the banner and gift bags this week.

March 14, 2011

Showing Some Love

 For visiting teaching my companion and I switch off doing the lesson every other month. Last month was my turn. Often I try to incorporate a handout or object that can be handed out to remind the girls of the lesson. But sometimes my month falls on a holiday and I just go with that instead because, well, it usually involves food and who doesn't enjoy that?

Last month the message (http://lds.org/library/display/0,4945,2044-1-5246-1,00.html) was on the organization of the Relief Society and its importance in our lives. I really appreciated learning its divine purpose and how each and every one of us has a divine mission here on this earth. However, my favorite part is when Julie Beck points out the magnitude of our woman's organization. It boggles the mind to know how many righteous women are united with the same goals, to fulfill the threefold mission of the church. That is so powerful!

For my handout I focused on Valentine's Day, well actually on love.
I bought boxes like these ones from a little locally owned store called Pioneer Party in Lehi, UT.

They always have great gift supplies and also have handouts with little gifts for the monthly visiting teaching message that you can buy!

They seem to charge between $3.50-$4.50 depending on the month.  I don't like to spend more than $2.50 on mine because I do four girls each month- but it's still a great resource.


I lined the boxes with tissue paper and then put a layer of pink and white m&ms on the bottom. I found strawberries on sale for 2 for $4 and used leftover melting chocolate to make pretty chocolate covered strawberries. Each box fit 5 dipped strawberries very nicely.


To tie in with the visiting teaching message I looked through several blogs online and finally found this awesome image from "It's a Sweet Life"  (http://gingerbreadheaven.blogspot.com/2011/02/diana-ross-and-visiting-teaching.html) For some reason I'm having trouble downloading it directly- so the link will have to do.

It says: 
"I love Visiting Teaching. Relief Society invites us to come and walk in the footsteps of the Savior." 
  I just printed it out on card stock and used a paper punch to make it look cute.

To tie it all up I shared my testimony of the RS and how I do love it. All the blessing I have received from being a part of this great church and woman's organization.

March 13, 2011

Super Service

I have visit taught a fun girl and neighbor for the last two years. She went to the hospital to be induced and I hung out at her house watching her cutie pie son until he woke up from his nap.

While there, I was reminded of one of the handouts I had done last fall. I think it was August? Anyhow, the lesson was on temples and there was a meaningful story about the sisters who sacrificed to help build the temple. They crushed their china and used it to build shining temple walls. Such sacrifice from women who had so little and who have already given so much! What an amazing example of putting the gospel first and ding whatever it takes to have the temple in their lives. I wanted to give the women something personalized to this lesson that would encourage them to make the small sacrifices required to get to the temple.

This is what I came up with.


 The quotes say:


“Through His prophets, the Lord invites those who have not yet received the blessings of the temple to do whatever may be necessary to qualify to receive them. He invites those who have already received these blessings to return as often as possible to enjoy again the experience, to increase their vision and understanding of His eternal plan.
“During the construction of the Kirtland Temple the women were called upon to grind their china into small particles to be mixed with the plaster used on the walls of the temple, which would catch the light of the sun and the moon and reflect that light to beautify the appearance of the building.

I printed quotes from the lesson out on card stock matching same the plate's background and choose a coordinating font color. I specifically choose plates that had a old look about them, but also found them at TJ Maxx which helped the project come under my predetermined price point of $2.50 a person.

All the girls have had these displayed in their homes since the lesson so I guess it was a success.