Showing posts with label Stain. Show all posts

August 15, 2023

RH Cerused Driftwood Gray Table


For this week's project, we're back to my roots! Which means we're creating knock off Restoration Hardware colors today! This project is easy peasy, just apply to wood and watch the magic happen! You're going to love this tutorial to easily achieve the Reclaimed Gray Oak look.

Materials


Directions


Here's the "before" of this typical, out dated oak table. There's a million of these babies floating around from the 80's and 90's. It shouldn't be too hard to get your hands on one, and at a good price. 

If you're using a brand new, or raw wood table, please skip down to step #5. Thanks!

1.] STRIP
First you'll want to apply a thick layer of Citristrip to the table. Citristrip has a tendency to dry out before it can eat away at all the layers of stain and lacquer. So covering the wet stripper with a garbage bag helps keep the moisture in while it works.
2.] SCRAPE
When the stripper turns white, it's ready to be scraper off. Remove the bags and scrape as much of the mixture off, as you can. You'll want to try and get down ti the raw wood if you can. But being careful not to scrape or damage the wood itself. 
3.] CLEAN
You will want to wipe the table down with mineral spirits and a rag to remove any existing residue. This should remove any sticky residue from the tabletop. 
4.] SAND
Here's the labor portion. You want to use a palm sander and 80 grit sandpaper to make sure the wood is completely down to raw. You can see in this video what I mean.
5.] STAIN
Weatherwood released a new stain that can turn oak into a beautiful driftwood gray, called Light Oaking. This product can work on any wood, so it's incredibly easy to use.


6.] LIGHTEN
If you want to lighten the look, you can add a coat of White Maintenance Oil. It adds the look of patina and is just generally gorgeous. Simply brush or wipe onto wood, allow to sit 3-7 minutes. Then wipe off with a clean cloth. Or you can watch the video above. 
See how pretty and soft the white maintenance oil is? It's much more subtle than a paint product and really just makes the wood look sun-kissed.


For additional project looking to achieve the Restoration Hardware look, you can search our archives for tons of inpiration or check out this popular post below!


http://www.fromgardners2bergers.com/2017/02/diy-rh-reclaimed-gray-oak-table.html

I've also got a paint update for you guys! We are selecting our final shades for our The Furniture Paint launch, so keep your fingers crossed for me! xoxo

Follow on Bloglovin

photo signature7-2.jpg

June 7, 2017

DIY Restoration Hardware Gray Oak Finish


Today's project is sort of exciting, because before reactive stains we didn't have a way to create the Restoration Hardware finishes we love. Now in just a couple of steps, with minimal work, you can have the RH look in your home, and you don't have to spend $3K for one piece of furniture! So let's get to it, we are going to DIY the Restoration Hardware's Gray Oak Finish on oak, just like they do.

February 22, 2017

DIY RH Reclaimed Gray Oak Table


Did you know that colors only come from two sources? Light and pigment. Do any of you know what the primary colors are for pigment? Red, Yellow, and Blue. And for light there are three different primary colors? Red, Green, and Blue. To understand light, look at a rainbow. To understand pigment, simply pick up a can of paint. I've decided to broaden my horizons incase you haven't noticed, I'm asking because I'm going to start manufacturing a line of wall paints. I don't know how it will happen. I don't know who will do it for me. Maybe I'll do it myself? All I really do know is that I love color and I'm going to learn everything I can about it. I'm going to make the most beautiful paint the world has ever known. So here's a question for anyone who cares to answer. Would you buy paint from a third party? If so, what colors interest you?

October 5, 2016

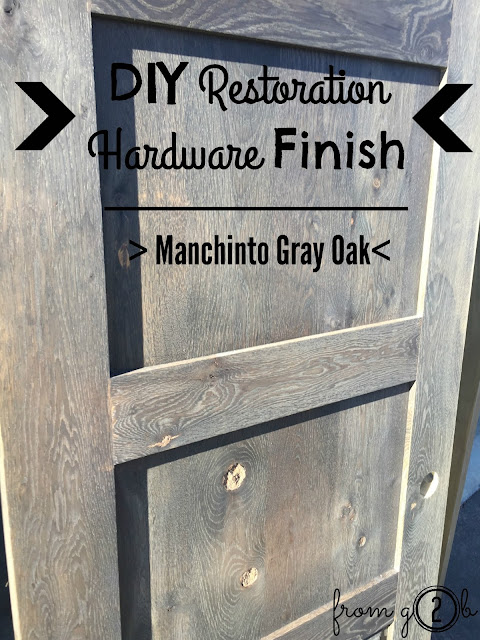
DIY Restoration Hardware Manchinto Gray Oak Finish


Oh friends, I have just had the time of my life in NY this past month. We just barely left and rolled into Boston this weekend. I know I've mentioned it before, but it's where I'm from and I haven't bee back since I got married nearly 15 years ago. Now Zack and I will be here for a month and I can finally show him all the amazing sites. If you like American History, or sports,... or food, it's one  best cities to visit. 

June 1, 2016

DIY Restoration Hardware Reclaimed Gray Oak Finish

Awesome DIY Restoration Hardware Reclaimed Gray Oak Finish Tutorial and Video#fg2b

Have you seen Restoration Hardware's new-ish branch, RH Modern? It's the same gorgeous RH look, but with the clean lines of mid-century modern pieces. I found this bedroom with the perfect gray furniture and I had to see if I could replicate it. 

April 6, 2016

Perfect DIY Driftwood Gray


Perfect DIY Driftwood Gray using #WeatherwoodStains on #fg2b

In this post, I want to focus on some of mother nature's best tricks. See, all trees have something inside of them called, tannic acid. This is the trees immune system. Much like our white blood cells, when the tree gets cut, the tannic acid rushes to the site and puts up a protective layer of resistance. This layer heals the tree and also prevents further damage. If it weren't for tannic acid, I wouldn't be able to gray out this door below-

March 9, 2016

DIY Restoration Hardware Modern's Black Oak Finish


You know I love me some Restoration Hardware, I mean, what girl doesn't right? So their new RH Modern line is so exceptional. I noticed this gorgeous finish and realized how easily you can get that look with Weatherwood. So I'm here to help all you RH sisters out. I mean, it's hardly fair that they exclude 99 out of a 100 of us on price alone. This is me, helping my fellow ladies out. Create this beautiful RH Modern black oak finish in 3 easy steps! 

January 20, 2016

DIY Restoration Hardware Burnt Oak Driftwood Finish


Eat your heart out Restoration Hardware! I got a colors for days and this girl ain't afraid to use them! This post has me super excited because it stems from one of the major reasons I'm thrilled about my wood stain business. When I created my line of weathering wood stains, it was because the high-end designer look was out of my budget. How many of you feel the same way? I mean how many of us walk into Restoration Hardware and walk out with nothing? 

May 27, 2015

DIY Restoration Hardware Weathered Gray Finish

diy-restoration-hardware-finish-with-Weatherwood-Stains

Brace yourself...this is gonna be a long one! Holy moly was this project intense, but oh-so-worth it!! I have been obsessed with the idea of a Restoration Hardware style table in our little dinning nook for over two years. You know what they say, "good things come to those who wait." Any ways, I wanted RH, but with their tables are too stinking expensive! It did take me forever to plan the project, find the table, and get the time to do it, but I fought the law and guess what... I WON! 

April 15, 2015

Weatherwood Stained Laundry Room Oak Table


I (virtually) met this wonderful faux painter- Kari Caldwell when she first used Weatherwood's Reclamation color on some cherry cabinets several months ago. Since then, she also used it on this little DIY project and I thought what better way to display this post than to share it with you- my blog friends. I think there are many of us without laundry rooms that lack shelving and room to fold, stack and store. 

November 12, 2013

Hand-Turned Wooden Vase

from gardners 2 bergers

I love, "Indiana Jones and the Last Crusade." It's one of my all time favorite movies. Near the end, when the knight asks Dr. Jones to choose a cup, he tells him to, "Choose wisely." For some reason, when I choose poorly, I hear the knight say, "You have chosen, poorly." Just like this;

November 3, 2011

✥ DIY ▪West Elm▪ Tree Stump Table ✥


I've seen these tables around the Internet for awhile and I loooove them! I would probably put two in my living room if there were space for them. I've seen painted and stained versions. But the one I'm hacking is from West Elm. I love it so much, from the stump, to the rug to the cool chair. {Doesn't it look a lot like an "inspiration" chair from my classifieds search?}
I kept an eye out for tree stumps for ever months! If you get a newly cut stump, it needs to dry out for a few months. After it's dried out the bark will come off. If you get one that's been cut for awhile, then you need to make sure it's not bug infested! {eek!} 
So that's why it took so long, trying to make sure it was tall enough, wide enough, old enough, but not too old or too short, etc.

First

 Clean'er up! Z and I sprayed pest control all over it for several days {some homemade stuff I whipped up, another post, for another day.} We left it outside to try while it simultaneously repelled pests. Then I washed it down to remove any residue.


 Second

The sides were the easy part, I just used a palm sander and some 80 grit sandpaper, then 180, then 320. Unfortunately, the top was cut a little uneven. I don't have a circular sanded so I improvised.  I added a sanding disk to my drill and it worked like a charm. Isn't she so pretty! Love, love the gray undertones in the worn wood!


Third


I used a homemade stain made from White Distilled Vinegar and Steel Wool pad. Just let the mixture sit for a couple days outside, it doesn't smell pretty. I didn't measure, I just stuffed a steel wool pad into the bottom half of my vinegar bottle (bottle was .5 gallon.)


Fourth


Wearing gloves, I ragged the mixture on, moving in the direction of the wood grain.
You can see what it looks like, as I'm wiping, the color is forming. The stain is a stinky, gray liquid. It's very easy to work with, easier than "real" stains, I think. When dry it looked like this. I was kind of shocked. I thought it would be a lot grayer in color. So, I started Googling and found this stain reacts differently with different trees. {whoops!}
I have no idea what tree my stump was from.
But the stain turned sort of reddish.


Third & Fourth {again!}


I lived with it for 1 whole day, before I made a new stain.This time I used Apple Cider Vinegar, the all knowing Internet said it would turn the wood grayish. I used the same process, just threw the wool right in the vinegar, sanded the stump super lightly, and reapplied the mixture.


You can see where I made hash marks on the stump there's almost a line down the middle, showing you the different colors that the 2 stains turn. Isn't it funny that the white vinegar turns reddish and the red vinegar turns wood gray?

I was kinda petrified to do the new stain right on top of the old, but I figured  could always sand it. {again} The new color is just perfect, a tan and gray mixture! I am so glad I tried again. 


Since I was already playing around with it, I tried two more experiments staining the wood.


  1. I also sprayed some clear sealer on, just to see what would happen. It made the wood look a little yellow.
  2.  I also brewed some Tea to stain the wood. Tea has tannic acid in it, a chemical that reacts with the vinegar
  3. I read a few different tutorials and some said to apply the tea 1st, let it dry, then brush on the vinegar; while others said to do the opposite.
  4. I just brushed some tea over the vinegar that I had put on the stump days before. I was shocked how dark it tuned! I tried to give you guys a picture of the different results.


Thanks for checking out my new table!!  Have you guys made one of these? Are you planning to now that you've seen my beauty? lol  I wouldn't blame you cuz I love it!


Disclaimers: I've heard this stain will keep long term. That's awesome, but I probably wouldn't keep it a plastic bottle, like the one I used to mix my stain. Make sure you poke a hole in the lid, to let the fumes escape! As always, I'm telling you all how I did this project, but I'm not a furniture professional or a scientist- so wear gloves and follow along at your own risk. Although I didn't have any problems and haven't heard of anyone having them either.
I'm also linked up here.

July 14, 2011

Wood Grain Initial Plaques


I've been working on a gallery wall for my front entry way. I thought I would some personalized typography would be the perfect thing to break up all the frames. I had two pieces of scrap wood. (Actually 2 blocks of wood from some "never got made" pinewood derby kits.)

But I remembered a number 7 that was made from Young House Love. Here's my take on that project.

 [1]  Sloppily stain one side of the blocks of wood.

 You could also leave it plain wood tone, but I used some clearance stain so that it would somewhat match the dark wood in my home.

 
[2] Using Microsoft Word {or something like it} choose your font, change your desired letter into the dimensions of the wood piece, & print it out.

  [3] Tape over the dry stain with painter's tape, covering the whole piece front. 


[4] Tape the printed letter over the painter's tape.


[5] Use an Exacto knife to cut out the letter, making sure to press hard,
cutting through the paper and tape.


[6] Peel off tape around your letter and paint 2-3 coats of paint, peel of letter shaped tape when final coat of paint is still wet.

[7] Apply clear coat.

[8] You can attach picture hanging hardware- or like in my case, just drill a hole with your Dremel for the nails to fit into.

Here's an up close of the finished plaques, it's a little hard to see the wood grain in the pics but I tried my best!

As always, thanks for for checking out my project! And a BIG thanks for these oh-so-fabulous sites who've featured this project!!

June 21, 2011

Ottoman Makeover


Here's a ottoman I recovered last week. When I found it, the legs were cracked and discolored. Unfortunately, I didn't take a true "before" pic, because I decided to knock out the stained portion while up at my in-laws. They have a garage, while I only have a condo. 

Recovering an ottoman is simple and easy. You'll love how fast the little piece can be transformed! 

  1. STAIN: I decided the legs would look best stained dark because of the chrome feet. So I used some I got on clearance. Ragged it on and wiped it off.
  2. STRIP: That takes us to the next potion- the silk fabric was all discolored. Initially, there may have been only a small stain- which someone may have impatiently used some Resolve Carpet Cleaner on, which was sadly with her at her in-laws. Yeah, it didn't work. No matter, it needed to be updated anyhow. It was easy enough, just a few screws held the base to the top. Rip off/remove the black backing hiding 30,000 staples. I also pulled out the tufting at this stage. I like tufting- as you can see here for my dropcloth ottoman makeover- but I thought this one would feel too "stuffy".
  3. WRAP: I seem to gravitate towards geometric patterns. But this was a lot easier to work with than stripes were on the headboard I covered. It's simpler to keep everything lined up when the object is small enough to manipulate and move around. I grabbed this fabric from JoAnn's ~ it's a Waverly print.  got it for 50% off-so 10 bucks a yard. If you've never reupholstered an ottoman, it's very easy.
(a) Lay the fabric, good side down, on the floor.
(b) Lay the fabric, good side down, on the floor.
(b) Lay the cushion on top of it and line up the fabric.
(c) Staple one side, then the opposite side, pulling fabric taut but keeping pattern lined up.
(d) Then do the same to the opposite two sides

(e) Pull the corners down and staple them once you like how you've folded them. It's like wrapping a foam and fabric present-umm, with staples.


Thanks for stopping by! What fun patterns are you using in your home? Have you redone an ottoman lately?
Update:  Check this out! I was featured on About.com in an article and "Color and Pattern"!! Make sure to check out these other AWESOME sites that featured my makeover!
Hope you like the "after"! Now if I could just learn to sew I could tackle my other ottomans.