Showing posts with label LightOakingStain. Show all posts

August 15, 2023

RH Cerused Driftwood Gray Table


For this week's project, we're back to my roots! Which means we're creating knock off Restoration Hardware colors today! This project is easy peasy, just apply to wood and watch the magic happen! You're going to love this tutorial to easily achieve the Reclaimed Gray Oak look.

Materials


Directions


Here's the "before" of this typical, out dated oak table. There's a million of these babies floating around from the 80's and 90's. It shouldn't be too hard to get your hands on one, and at a good price. 

If you're using a brand new, or raw wood table, please skip down to step #5. Thanks!

1.] STRIP
First you'll want to apply a thick layer of Citristrip to the table. Citristrip has a tendency to dry out before it can eat away at all the layers of stain and lacquer. So covering the wet stripper with a garbage bag helps keep the moisture in while it works.
2.] SCRAPE
When the stripper turns white, it's ready to be scraper off. Remove the bags and scrape as much of the mixture off, as you can. You'll want to try and get down ti the raw wood if you can. But being careful not to scrape or damage the wood itself. 
3.] CLEAN
You will want to wipe the table down with mineral spirits and a rag to remove any existing residue. This should remove any sticky residue from the tabletop. 
4.] SAND
Here's the labor portion. You want to use a palm sander and 80 grit sandpaper to make sure the wood is completely down to raw. You can see in this video what I mean.
5.] STAIN
Weatherwood released a new stain that can turn oak into a beautiful driftwood gray, called Light Oaking. This product can work on any wood, so it's incredibly easy to use.


6.] LIGHTEN
If you want to lighten the look, you can add a coat of White Maintenance Oil. It adds the look of patina and is just generally gorgeous. Simply brush or wipe onto wood, allow to sit 3-7 minutes. Then wipe off with a clean cloth. Or you can watch the video above. 
See how pretty and soft the white maintenance oil is? It's much more subtle than a paint product and really just makes the wood look sun-kissed.


For additional project looking to achieve the Restoration Hardware look, you can search our archives for tons of inpiration or check out this popular post below!


http://www.fromgardners2bergers.com/2017/02/diy-rh-reclaimed-gray-oak-table.html

I've also got a paint update for you guys! We are selecting our final shades for our The Furniture Paint launch, so keep your fingers crossed for me! xoxo

Follow on Bloglovin

photo signature7-2.jpg
March 18, 2020

Fireplace Refresh & The Medici Tomb


Michelangelo is a true master. Walking through his town, over 500 years later, I couldn't help but imagine what it would've been like for him. To be growing up in Florence, the end of the 1400's! You would've seen people walking in renaissance garb, oil lamps burning, children and animals in the streets. In some ways Florence has changed but it others, it never will. Towards the middle to end of Michelangelo's life, he returns to Florence to work on the crypt of his benefactors and Florence's rulers, the Medici! We visited the crypt which was styled after the Pantheon. Check out the post below, you won't want to miss it!


You guys are going to LOVE this fireplace refresh from our friend Kelly at Street Flea Style! She turned her outdated red brick fireplace into a modern and updated space! The previous mantel began as a nearly pink color! But don't worry, wood is forgiving and it's 100% gorgeous again.


Materials


Directions


You can use this same staining technique on FAUX BOX BEAMS -like this post- or on solid wood beams, like I'm going to show you today. You can stain any wood, but we're working here with cedar. That's a super common wood for this type of project. 


1.] You will want to stain the red cedar with Weatherwood Salvage stain. We strain the stain and then put the stain through our gravity sprayer and applied it to the wood in even coats. We apply a heavy coat of stain and let the wood air dry for 30-40 minutes.


Depending on the red cedar you have, the color result will be anything from brown to dark gray to gray and brown mixture. That's because the tannin in cedar varies so much. Check out the Color Chart for more options! For a DARK GRAY result, use Pining Stain. For a LIGHT GRAY result, use Light Oaking. For a BROWN color, use Salvage Stain. 


BEFORE: As you apply the stains, you can see the wood turn from bright red color. 


AFTER: And in about 30 minutes, the wood changes to a beautiful barnwood brown. You can This type of stain completely alters the undertone of wood. 


Don't forget to visit our friend Kelly at Street Flea Style and see more from her groghsou home. For more color options, see our Color Chart for more choices and don't forget to save 10% on your first order with code: WELCOME10.

Follow on Bloglovin
photo signature7-2.jpg

March 4, 2020

Live Edge in Driftwood Gray & Palazzo Vecchio Tower


This is the closest square to our AIrBNB - its Palazzo Vecchio and it houses Palazzo Vecchio. Which means, the old square has the old palace! This was the first museum we went to in Florence on Day 1. But heading to the top of the tower was one of the last things we had planned. The views of Florence were a 10 and we wanted for the perfect sunset to give it a try. 


December 25, 2019

Oak Flooring & the Perfect Gray Brown


Hey friends! I hope you're having a fabulous holiday! It's the happiest time of the year and we are spending it in Paris! It's our first time to the city, lost pics to come, I promise!  

December 11, 2019

Perfect Grey for Any Table


Pine is the easiest wood for DIYers to get, just about anywhere in the USA. But it has prominent wood grain and doesn't always take wood stains evenly. But with reactive stains you can get beautiful color and that grain will look 100%! Check out this pine farmhouse table, the color is totally dreamy and it looks like it's straight out of a Restoration Hardware catalog!

December 4, 2019

Layering Reactive Stains: How To


Hey guys, it's finally getting chilly in Italy! I can't believe it will be Christmas in no time! They don't celebrate as much in Italy, as Easter is their giant holiday. I've also got a paint update for you guys! We are selecting our final shades for our new paint line launch, so keep your fingers crossed for me! This week's project shows you how easy it is to layer reactive stains! 

September 4, 2019

Easy Brown/Gray Floors & Palazza Vecchio


We are staying at the best location in Florence! We are a 5 minute walk from the famous Santa Maria Fiore and Palazza Vecchio is right outside our door. The palazza has near continuous free weekend concerts and is always filled with people and street performers. It is so much fun. We are so close we just listen for the music and head down tot palazza to enjoy the performance. 


The other day we walked outside and there was a large parade with women dressed in incredible gowns, flag throwers, and military. 🇮🇹  I have absolutely no idea what we were celebrating but it was a blast. The parade closed with a real wolf being walked through the streets! 🐺

March 20, 2019

Weathered Beams & Apostle St. Andrew in Amalfi Coast


The incredible final resting place of the Apostle Andrew, in the tiny town of Amalfi on the Amalfi Coast. Duomo Di Amalfi towers above the small Amalfi square. You can see the duomo dwarfs the rest of the square, looking up these grand squares. This footage is mostly from the upper portion of the duomo, which was built in 900 AD!


February 27, 2019

Driftwood Glam Coffee Table & Duomo Napoli

This amazing duomo is just down the street from our AirBNB! We just stumbled into this impressive Chiesa, after grabbing some award winning pizza (more on that another day.) Italy has these (nearly) thousand year old buildings all over, and then you step inside and and your jaw hits the floor. The one is from 1200's. 

February 6, 2019

Driftwood Live Edge Console & Reggio Calabria


Reggio Calbaria is on the bottom of the boot of Italy, it's not a popular destination for American touritsts but it caught us for December. We spent a few weeks there after we left Sicily. The weather was pretty great and we were staying right on the beach. Here's a few of our highlights. 

January 30, 2019

Blogger's Driftwood Gray Hardwood Floors & Trulli Homes in Alberbello


Okay, I’m in love with these darling little homes and I don't care who knows it! They’re called trulli and from what we read, they’re only found in this Puglia region. We are in Alberbello, where trulli homes are abundant and date from 1400 AD. I think they’re enchanting. 


January 2, 2019

Textured Wood Creates Authentic Weathered Look


I celebrated a BIG birthday this last week! 4-0 if you can believe it, I hardly can. We spent the holiday on the southern coast of Italy. It was truly magical and I'm feeling all kinds of blessed being able to spend this year in Italy! I will for sure share more next week, but for now wishing you and your family the love, light, & happiness in 2019!

December 12, 2018

Refinished Farmhouse Coffee Table & St John's Church in Syracuse, Italy


While staying in Catania for two weeks, we were able to take some day trips. One of these day trips was to Syracuse, Italy to check out the famed St. John's church. This site is where St Paul came in 59 AD. History goes like this, St Paul was working in Jerusalem as a missionary when he was arrested by local Jews. He exercised his rights as a Roman citizen and as such was being extradited to face trial in Rome. On the way, he was shipwrecked in Malta and then stopped in Syracuse where he preached at what is today's St. John's church- *I don't get the name either. 

November 14, 2018

Maple Slab Table & We're in Rome!


Hey friends! Well, somehow we made it to Rome. The trip took 18 hours due to some delays along the way, but no worries- we're in one piece and look at this place! We are in Rome for only three days and then we will be moving to the southern Italy. This Air BNB has a double rooftop terrace, one on each side, both are long and this one is also wide.

October 24, 2018

Farmhouse Style Wood Bar


Back to the basics. I know you all love is what I've been doing with my stain. How much do we love the colors of your favorite vintage farmhouse? Well, you can finally have them. Easy peasy, just apply to wood and watch the magic happen! You're going to love this tutorial to easily achieve the Chip and Joanna farmhouse look.

Materials


Directions


For this project any old piece of furniture made from real wood will work.

1.] STRIP: First you'll want to apply a thick layer of Citristrip to the table. Citristrip has a tendency to dry out before it can eat away at all the layers of stain and lacquer. So covering the wet stripper with a garbage bag helps keep the moisture in while it works.
 
2.] SCRAPE: When the stripper turns white, it's ready to be scraper off. Remove the bags and scrape as much of the mixture off, as you can. You'll want to try and get down ti the raw wood if you can. But being careful not to scrape or damage the wood itself. 
3.] CLEAN: You will want to wipe the table down with mineral spirits and a rag to remove any existing residue. This should remove any sticky residue from the tabletop.
4.] SAND: Here's the labor portion. You want to use a palm sander and 80 grit sandpaper to make sure the wood is completely down to raw. 

5.] STAIN: Weatherwood released a new stain that can turn oak into a beautiful driftwood gray, called Light Oaking. This product can work on any wood, so it's less complicated than some of their other products. You can layer this product for the perfect gray! Just wait 30 minutes between coats.
6.] PROTECT: Seal with 2-3 coats of Weatherwood Varnish topcoat.


You're going to love our newest stain. The Light Oaking is simply gorgeous and so easy to use. I'd love to see your Weatherwood projects. 

And please don't forget to give me your feedback about paint. This is going to be an amazing year!

Follow on Bloglovin

 photo signature7-2.jpg

October 17, 2018

Driftwood Walnut Buffet Makeover


Hello friends- Fall is fast upon us and Zack and I are less than a month away from our Italy departure. It feels like time has become this vacuum towards our IT departure and I'm just trying to hold on for dear life. I thought I'd answer one of your most asked questions today. Everyone always asks what my favorite Weatherwood product is for refinished furniture, in particular. No, it's not my original formula, the Reclamation stain. It's a no-fail gray perfect for weathering any wood type. It's called Light Oaking and it's gorgeous on this gorgeous walnut piece from Cathy!

September 5, 2018

Restoration Hardware Inspired Mahogany Dresser


It's my favorite kind of project! A Restoration Hardware inspired piece! I loving getting that look at an affordable price, don't you? Let's turn an old garage sale find into a RH masterpiece!
We got this old mahogany dresser, but this project will work on any wood type. Here's our inspiration, let's get started...


May 9, 2018

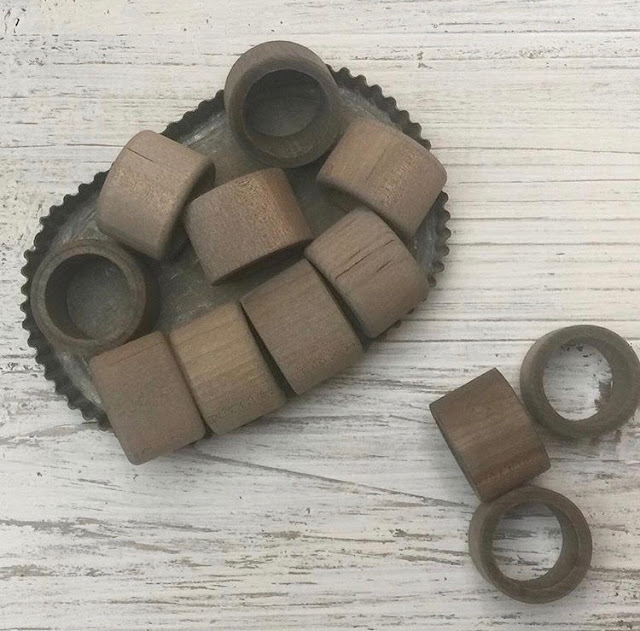
Nautical Wooden Napkin Rings

Nautical Wooden Napkin Rings with Weatherwood

You guys! Zack and I are back in Forks, WA this weekend and it's been 5 years since we were last year. Forks is incredibly beautiful and is located in the Olympic peninsula, in WA. There's a real rainforest nearby and several of the dreamiest, most mystical beaches you've ever seen. It's eye candy for days and my eyes are soaking it all in.


March 21, 2018

Gray Ash Industrial Table


When I was a teen, I would go to Girl's Camp for a short week each summer. When girls would come into the cafeteria late, the whole cafeteria would sing this camp song AT them about "lateness". This song ends in the whole room shouting three times, "You're late, you're late, you're late!" My post is late, consider me sing to.

March 7, 2018

DIY Driftwood Gray White Oak Floor


Hey party people! Everyone on the East Coast seems to have these old oak floors in their home, which is awesome because you can hopefully give them a major makeover. I have this amazing  floor tutorial for you. It makes your floors easy enough for you to DIY them!