April 9, 2012

✥ Reader Feater: Romantic Bedroom Reveal ✥

 I hope you all had a super wonderful Easter holiday!  I ate myself sick on Cadbury eggs and Lindt truffles- now I need to get to the gym! Eek!

Today one of my bloggy friends, Katie, has agreed to share her bedroom with us! She's a crafty mommy of 5 and blogs at Creatively Living. {Where does she find the time!?!}
Katie focuses on making regular old thrifted or plain looking items into fabulous home decor. She also shares room makeovers, like her bedroom, done on for next to nothing. Now that's a talent. I also make it a point to link up at her: Tell it to Me Tuesday PARTY!!

✧✧✧✧✧
Welcome.... 

To a tour of my newly renovated bedroom. 
I've tried for the life of me to find some before pictures, but I painted this bedroom 4 yrs ago, before I blogged, and although we found pictures of the rest of the house pre-reno, I guess the bedroom didn't get photographed much. (Although I distinctly remember seeing a picture of a kid in a playpen in the room....so I'll keep looking.) 

Anyways, it was (no joke) sponge painted a mint green and sky blue...and when I say sky blue...it couldn't have been BLUER! Even the window trim and baseboards were sky blue..and the ceiling! The vanity area and the bathroom were a dark brown and light brown that were also sponge painted on and it also had a sand castle boarder.....so as you'll see, this is quite a change.


I've had the room painted for 4 yrs (only because the bright blue/green sponge paint job was somewhat difficult to sleep with every night), but I had literally lived with the window seals 1/2 painted, 1/2 finished everything, tape still on, and huge gaps where the previous owners had taken off the quarter round for carpet, for four years! It's funny how we put our bedrooms off! Then a couple challenges came along (Imagine the Impossibilities and the First Project of 2012, which you can see at the bottom of the post) and I thought, yep, I better finish up that bedroom!

The 1st year, I took the carpet out and re-did the wood floors myself, and painted.
2nd year I found some of this bedding and added the chandelier. The tables I also found, but redid them last week. You can see that here. 


This is my favorite wall. I started this gold frame picture collage last summer, but didn't have any matting, frames painted, or pictures in it until the last 2 weeks. I LOVE it!!!
The fire place was a Christmas present to ourselves 2 years ago (Costco). I LOVE it also. It and the lamp shades are the only things in the room not found either 90% off, from Craigslist the Goodwill or a yard sale. 

 This is the most cozy place in my world. I get up, before the kids with a cup of coffee, that cozy throw and my bible. I have that light and the fireplace on and sit and do my devotions, and then get on blogs.....I could stay there forever! It's pure awesomeness! 


I recovered the chair and made the pillows last week also (told you it has been a crazy week!). Tutorial on my tassel edged and the Union Jack inspired pillows to come!

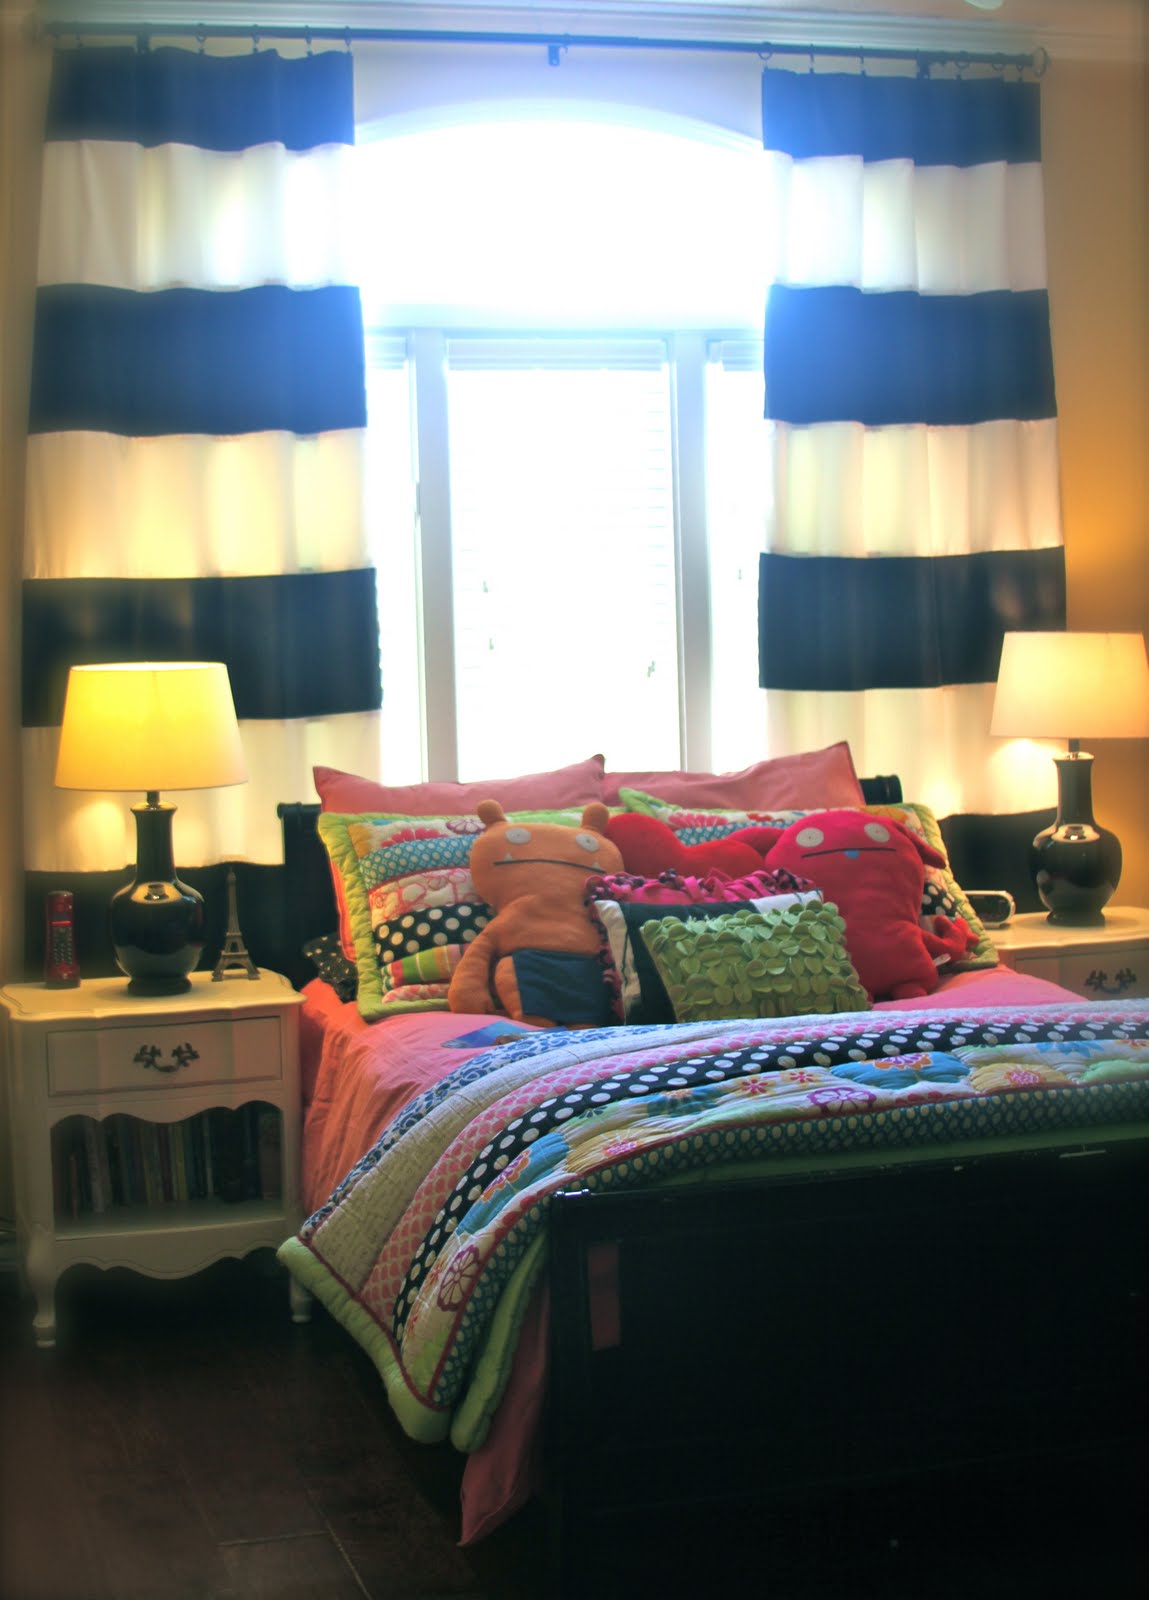
This is my bed. Everything in the room is a Goodwill find, a Craigslist find, a yard sale find, or on super clearance at Walmart. I honestly think the lamp shades and the fireplace are the only exceptions. You can find a run down of where I acquired just about everything in this picture here.  Don't you just love the owl pictures from the GW. They have names written underneath...Winky and Blinky! lol


Another bed picture.


So, you've seen one side of the room. If you turn you'll see the vanity area, walk-in closet and a teeny, tiny bathroom. This house is a 1948 ranch. If you google Alphabet houses in Richland WA. You can read about how the entire town was built by the government in four years for the Manhatten Project (to build the Atomic Bomb).  It's incredible history. The original owners took one of the upstairs bedrooms (you know those tiny bedrooms in old houses that aren't really even bedrooms) and turned it into this vanity/walk-in-closet/bathroom area. GREAT idea!


Here's one more bed shot from the hallway.


My little plant and recovered books.


This is my Junk Art Wall. You can read about it Here. I found both the mattress wall art and the table below it along side the road. 


Pictures of my husband and I, my kids and my grandma on her wedding day.


This area I do have before pics of.....somewhere. I'll have to find them, but I'm excited, so I'm posting this without them. This was the wooden light fixture box, wooden 3 hinged mirror, and dual brown sponge painted area....with the sand castle boarder :)   Can you believe I found these mirrors for $3.95 each at Lowes when I lived in HI??!!  They must have priced them wrong. I bought ALL of them (I think there were 6 left at the time), sold some, and have hauled these around for 4 years lol! Now they look great in their new home. 
I'll do a tutorial on how I refinished the cabinets later. 


My little grouping of things from yard sales/ GW. The middle one is candle sticks stuck together. 


You can see I how I made my Junk to Jewelry holder here.  


My DIY wall art out of clearance picture frames that I made last week. You can see the tutorial here. 


So, I'm soooo excited to have this finished! I'm glad that I had some good "challenges" to link up to, in order to keep me going!  Thanks for stopping by on my room tour!


--Katie

✧✧✧✧✧
Hasn't Katie done an awesome job on this master suite? I have to keep telling myself- one day I won't have my elliptical next to my bed- and then I can have a pretty bedroom too! ;-) I love her chandelier- I mean, LOVE it!!
A few of my all time favorites from Katie-
 How about chalkboard backed kitchen cabinets? Yes, please! A bold move- but it paid off. I love how the black walls make the items pop!
And this oh-so-sweet nursery!
Do you see the reflection of yet another chandelier? I am dying right now!! I've wanted a over-the-bed chandy for over my grown up bed for ages- am I having infant jealousy? Haha!


[PS] I feature YOU GUYS  {my readers} every Monday! Do you have a room makeover- or maybe have a home tour you'd like to share? 
Drop me a email or shoot me a link. Let's see if we can work it out!!  xoxo

April 5, 2012

✥ "Spring Into Action" Challenge {week 1} ✥

Ooohhh! I am kind of excited and kind of nervous to post about this little collaboration today. You see, I was contacted by Linda from My Crafty Life about a Spring Into Action Challenge. She thought is would be the perfect excuse for us girls to tackle a project we had all been procrastinating. 
I must admit there are a few I need to get on- but because I can't wait to see how it turns out, I chose this one.
 It's the side tables in my living room- I have two of them. So there just cheap MDF tables, from Target originally and bought back in 2005 I think. I {fake} wood has a reddish tint in certain lights- that, honestly, drives me crazy!
Now this is no simple "paint a table" project.
Nope. My plans are pretty intense and, as a hint, I'll tell you I think they'll require several coats of paint and some stain will be involved too. Now you can see why I'm nervous- with so many steps involved I have no idea if they'll even turn out!!

The are 12 of us doing the challenge- the undaunted dozen. If you get the chance stop by and see what these other awesome girls are planning! I'm excited to see what everyone is planning.
Suzy – Saved by Suzy
Tiffany – Living Savvy
Cathy – Room Room Rx
Carrie – Hazardous Design
Sam – The Junk House

 Now the rule is- if my project super sucks, there can be NO judging! ;-) It is a bit ambitious, I'm not gonna lie!  {What if I fail miserably!} But you guys will hear an update from me next week. Then in 2 weeks- the big reveal!
What have you guys been working on- or rather what have you guys been putting off?!

April 4, 2012

Burlap and Ruffles Union Jack Pillow

I almost forgot about this little DIY pillow cover post I shared at Cherished Treasures a few weeks back. So here ya go- in case you missed it! {and if you already saw it- eek! sorry to be repetitive!}

I saw this super, duper cute pillow from darling Aimee at Twigg Studios and I knew I had to make my own! Well, I love most of the pillows she makes- but since  I don't sew, this was the only one I thought I could make! Haha!

I made a no-sew pillow using a down pillow that had seen better days and this no-sew pillow tut from the hilarious Cassie. Since it's basically ironing and cutting, even I could handle it!! The key was the Peel n Stick fabric fuse. It works like a charm and made the pillow so easy to make!

For the cute little ruffles I followed Aimee's tutorial. Just cut strips of cream flannel, which incidentally I had on hand- lucky coincidence. Then I wrote out the union jack pattern with chalk {just like she said to.}

Then I went rogue!! Aimee stitched her ruffles on and I {had to} use a glue gun to attach the mine.  I am crazy amazed at how awesome the glue is holding. I wanted to move one of the ruffles over and you couldn't get it off if you tried. Well actually, I mean, I did try and it wouldn't budge!
Isn't the pillow charming!? I think it makes the perfect textural addition to the little sitting area in my bedroom. I love how burlap adds an earthy feeling, grounding my silk curtain panels.
I'm sure this new addition will make the 5 whole minutes I get to sit down there and read that much more enjoyable!!

Do you have any special spots for reading? Little nooks you creep away to  for a few minutes to yourself?


Looking for places to link up your projects? Check out my Party page.
I'm also linked up here.

April 2, 2012

✥ Reader Feature: Tween Room ✥

Did you guys have a good weekend? Mine was full of work- blah!
{Aaaannnnd today is kinda a big deal for me- nothin to do with blogging- but somebody cross your fingers for me or say a prayer that I don't get tongue-tied and fall on my face. Of course I'll share more down the road...if all goes well! Ha!}

Today Kelly from Oak House 5 has come to hang out with us! Kelly is a real sweetheart. She blogs about her home- and all things pertaining to it, including:  recipes, design, decor, , and family anecdotes.
Today she is here to share her younger daughter's bedroom. I may be having bedroom envy- this is a far cry from the white box I grew up in... no jealousy though, I swear!
This room is so perfect for a young girl! It makes me want to snatch one up just to I have a reason to make a room look this cool! I am a little obsessed with the black striped curtains, the yellow walls, and a photo gallery wall to rival anything a "real" designer could come up with- Kelly has no formal training, she's just cool like that!!

✧✧✧✧✧

This is my 11 year old daughter's room. I  don't normally do children's rooms, but I LOVED helping Abby with this room. The yellow is so happy and this is not a "show" room, everything in this room is personal and kid friendly. From the bedding to the art to the ballet bar, karaoke machine and massive stereo, this is my girl's place for reading, dancing, singing and jamming out to her own personal playlists. I couldn't be happier with the project!


Everything on the walls is either old and sentimental or something that just "spoke" to Abby from clearance sales to garage sales. It was all about building a room around Abigail's extraordinary character.


The tween years are hard, she is growing up but still loves her dolls. We came up with a great way to get the dolls off the floor where she can still enjoy them by mounting these floating shelves from Target.


A kids room needs to be functional as well as aesthetically pleasing to the eye. I feel like this room fits my daughter and we like to think of it as understated whimsey on a budget! Whatever your child's personality, let their space reflect it! Happy decorating!

Cheers,
Kelly

✧✧✧✧✧
Don't you just love that room? Sigh...I love how Kelly embraced and designed an Anthropologie-ish, vintage-y space. Can you believe she had the items on the gallery wall in her attic?! I think I could go shopping in an attic like that!!

 Since we don't all have teenaged girls- I thought a share a little more eye candy from Kelly's home! 
 Her entire home looks like it's straight out of a magazine! It is so, so beautiful. Check it out for yourself here.
But whatever you do- make sure you check out Kelly's amazing kitchen reno! It is so, completely amazing!! Can you believe that chandy? Ohmygosh! {Shh, I may have already featured this room  a few months ago!}
[PS] I feature YOU GUYS  {my readers} every Monday! Do you have a room makeover- or maybe have a home tour you'd like to share? 
Drop me a email or shoot me a link. Let's see if we can work it out!!  xoxo


March 29, 2012

Faux Zinc Mirror [Laminate Mirror Makeover]


Good morning dear friends. I've been blogging for awhile now- so there's really no good excuse for the terrible, awful thing I've done. But let me tell you what it is- and then try to explain myself, then, and only then, I hope you can forgive me.
The story begins, before I started blogging, and before I decided what my style was. I lived in a very brown house, with very brown furniture and very brown decor. One of those brown items- a laminate mirror with scrolling flowers on it. I bought it back in 2004 when the hubs and I moved into our first real apartment. Since then I've had it stored- you know, until I could figure out something to do with it.
Then, late one night, Z was meeting with his editor and I was hiding out in our room. So I used what was in there to keep me busy. 
Some Rub-n-Buff, an old toothbrush, and this mirror.

Now, how in the world was I to know this mirror would start to look awesome!?! When I figured it out- I grabbed the camera and took a pic of the last but of brown, flowery-ness.
There you have the truth. Can you forgive me? 

UPDATE: I found a before pic! However, since I didn't really know how to take pics then, the detail on the mirror isn't very prominent. But you get the idea.

Now my problem is, how are you going to understand the amazing before and after transformation?! You won't. Bummer, guess you'll just have to take my word for it. I've used the Rub n Buff for zillions of things in the past. But never on a whole mirror and never with results this cool!
 

I used a toothbrush cause that stuff can soak through cloth and even rubber gloves!! This way, your hands stay clean. 
If you look on the left side of the frame, where the toothbrush is, you'll see a light coating of Rub n Buff. You can see the original texture showing through. 
But if you look on the right side of the frame, you can see where I built the Rub n Buff up higher in some places. It made the finish uneven and mottled looking.
Then, an amazing thing happened, it really started looking like zinc!! An incredible stroke of luck!

 If you don't "Buff" the Rub n Buff, it will come off on your hands. I used the toothbrush to polish it- then some cheese cloth to give it one last once over. It makes the mirror safe to touch- and look at how reflective the finish is. 

I used a little black glaze to darken some of the areas and catch in some of the grooves. If you rub too hard it WILL take off some of the silver finish. So use it sparingly with a light touch. You can see in the pic above, the mirror's a little darker in places. 

I found this listing for a real zinc mirror- selling on Amazon- and I think it looks so similar!! Can you believe it? Restoration Hardware- you know, my favorite store- sells zinc mirrors and they charge an arm and a leg for them. Their version is a darker gray zinc, though.


I totally cannot believe this mirror turned out well! Like I thought I would salvage the mirror but that it would need a whole new frame. For a 2 dollar bottle of silver finish I replicated the look of a $90 mirror!

I don't think paint could have transformed it the same way, it would have either left the same flowers or there would have been a plain silver finish. This way I have the textural look of one of my favorite metals!

I just love when you can salvage something that you saw as garbage. But I still wish I had a before pic. Just trust me, it's better now! ;-)
{Psst: If you're interested- I made the giant B from cardboard and paper mache, tutorial is here- and the French Bee Lamp tutorial is here.}