Showing posts with label Tips. Show all posts

June 20, 2011

Cleaning Supply Recipes & Printable Labels


This would be the 3rd post with all-natural, homemade cleaning supply recipes. But this time, I'm also posting a collection of downloadable labels for them. {yay} If you missed the other cleaning suply posts, you should definitely check the out. I posted quite a few recipes for all types of cleaners. You can click here for Part 1 and here for Part 2.

For the first label source, head over to Making Chicken Salad and grab these cuties for glass cleaner, soft scrub, counter cleaner, and powder cleaner. She even provides you with recipes for these four cleaners, but hopefully you've been grabbing the ones I've been posting and will only need the one for soft scrub. Here's my soft scrub recipe and she has another option posted!

Soft Scrub for Fixtures:

  • ½ c. Baking Soda
  • Castile Soap
  • 10 drops of Antibacterial Essential Oil (optional)
Add enough Castile soap until you have a frosting-like consistency
Scrub, then rinse with water

I have to say these labels from Vinnie Pearce are my personal favorite. I heart them and will printing these off pronto! 
From this site you get labels for all purpose cleaner and carpet refresher- perfect to go with the recipes I've already given you. But I snagged this recipe for lemon dusters, from Wendy at Wendyl's Green Goddess, I wanted to make sure you guys had one handy.

Lemon Dusters 
  • 1/2 c. Water
  •  1/2 c. White Vinegar
  • 3-4 Lemons 
  • 6 drops Lemon Essential Oil
  • 6-8 pieces of Cloth to be used for dusting
Mix equal parts water and white vinegar in a bowl
Add essential oil a and soak dusters until they're damp 
Peel the rind of lemons and lay a few on each piece of cloth
Roll clothes lengthwise then roll that into a ball
Use as needed

How cute are these next labels?! They are from the unceasingly creative Martha Stewart
Are you surprised? You should have all the recipes you need for this one, especially with the clever- but vague- label titles.

I really like these labels- my only wish would be more of them! I bet you could print some blank ones and write in your own name. We have the Darling Octopus to thank for these guys.

Next we have laundry soap labels from Yum Universe. These are fantastically cute AND she offers them to us in 12 colors! Count them, 12! Uhh, thank you! I know I gave you guys a recipe or two for dry laundry soap, but in order to do these cute labels justice I thought I'd share my liquid detergent recipe as well. Be warned! It is not as easy as the other one!

Liquid Landry Detergent

  • 3 pints Water
  • 1/3 bar Fels Naptha Soap {grated}
  • ½ c. Washing Soda
  • ½ c. Borax
  • 2 gallon bucket
  • 1 quart hot Water

Mix soap in saucepan with 3 pints of water. Heat on low until dissolved. 
Stir in soda and borax until thickened. 
Remove from heat. Add 1 quart hot water to bucket, then soap mixture, mix well. 
Fill rest of bucket with hot water, mix and let sit for 24 hours. Use ½ c. per laundry load.

 
These next ones are not a download (*darn). But they are just lovely! So, for all those of you out there who own Cricuts, and the like, now you have some inspiration! Get on it and make your labels!

I'm pretty sure this goes to show our labels can be cute, even if they're just on cleaning supplies. I for one enjoy looking at beautiful things, even when it's while reaching for the toilet bowl cleaner...in fact, maybe a little but more then!

Make sure you check out my other posts, so you can bulk up your cleaning supply recipe lists!
 Check your basic supplies out here.
Add to your list here.

Oxyclean DIY Recipe


June 5, 2011

Knock Off Decor Rocks

Have you all been to Knock Off Decor?
If the answer is "no"- you need to make it a "yes" double ASAP! 

It is basically the best site to learn how other bloggers have done knock offs from our favorite brands, i.e. Pottery Barn, Restoration Hardware, Anthropology, you get the idea. You can browse by store or by project type, I bookmarked three projects in a row when I was looking through.

Check these great ideas out:
Do you guys love this as much as I do?

 Would stinkin love to own this- so making it may be in my future! ;)


Holy creative! Can you believe this is paper and cardboard?!

I am beyond thrilled to have two of my own projects featured!
It was winning the Miss America contest- well, actually- it was more exciting than that- it was like winning the lottery! Couldn't believe my knock off silver shells and turquoise lamp were good enough to make the cut!

So get on over there and check it out!

May 31, 2011

Perfecting Nail Head Trim

I don't know if you all noticed, but some of trim was crooked on my headboard.

I bothered me- a lot. Pretty much kept me from loving the project 100 percent. But it IS totally fixable, that is if Joann's would keep their trim stocked!!! I bought trim for the THIRD time to get this project perfect.

Here is my before-remember my excitement with the finally, finally finished headboard?
Well, day after day, these areas were all I could focus on.
 Thankfully, fixing it is not all that difficult.

To fix the trim what you want to do is grab the nail head with you needle nose pliers like this:

See how I'm holding the pliers on top of the strip- so the tips of the pliers are NOT touching the fabric? This is key to protecting it from damage. You can actually pull or wiggle out the nail heads but the top of the nail will probably be damaged. Can you see it on this photo?
So after the tacks that were securing the crooked portion of your line are pulled out will will be able to move the strip into the correct place. To do this push down with the foam and fabric in one hand and move the trim to where it needs to be then secure it with new nail heads.

Easy fix and it looks so much better!

Too bad I was too lazy to make my bed and take all the pics over. Aah!
At least it's finally finished....for real this time!

Thanks for taking a look!
 - Becca -

Linked up at these great PARTIES!
and more specifically here and here. 

May 27, 2011

Cleaning Thirft Store Lampshades


Today's post is featuring adventures in decontaminating cleaning thrift store lampshades! I have been sitting on several lamps that need major makeovers- but the weather is REFUSING to COOPERATE! 
I haven't been able to spray paint a thing for a WEEK!

Since I plan to remake several lamps, for two of them I thought it would be interesting to buy thrift store lampshades and try to clean them. I found some fabric lampshades to go with the bases. One looks pretty cheap- like a Walmart shade or something, and the other is a Restoration Hardware find, yay!. They both have visible stains/dirt and I can recover them if need be- but wanted to explore cleaning methods first.


HOW TO

1.] To clean a lampshade you should start with vacuuming it or wiping it with a dry cloth. Since these shades were visibly dirty I skipped the first choice and started with the next safest for fabric.

2.] You can mix some water and dish washing detergent in a 1:4 ratio with an egg beater until foam forms.  FYI- If your shade is silk the Internet says only to use Dreft or Ivory Snow, not dish soap. Apply foam to the whole shade and wipe with a clean cloth. If you only wet part there may be some fabric discoloration. This method is perfect for delicate materials and for shades that have glued on trim which will not hold up to water.

This probably would have worked for a shade that is lightly soiled. Something that hasn't been dusted regularly (or ever like my home!) and maybe some of the dust has ingrained into the fabric. If that method doesn't work you want to go extreme!

3.] Fill the bathtub with water and some dish soap and DUNK the shade making sure it is fully submerged each time. Don't leave the shade in the water! Pull it out and use a cloth to work the soap into the shade, especially any stains! You can then hang it to dry on the shower rod.

I washed the Restoration Hardware shade first and my experience was that this shade held up to the water well. It could easily withstand the washing. I dunked it quite a few times and worked soapy water all over the fabric. It turned out looking pretty good.


The cheaper shade had a much lower water tolerance. I dunked it about the same amount of times and then tried to scrub it but it had pulled in too much water too quickly. I let it sit to dry out but it was too far gone and the form was ruined. I would suggest scrubbing the highly soiled areas and then dunking the shade only once or at most twice if it's of a poorer quality.


So, umm-you can see the results for yourself. Here's an updated image of the lampshade today- if you want to know how to recover a lampshade, check it out! Hope this helps you guys!

- Becca
  Linked up here.

May 22, 2011

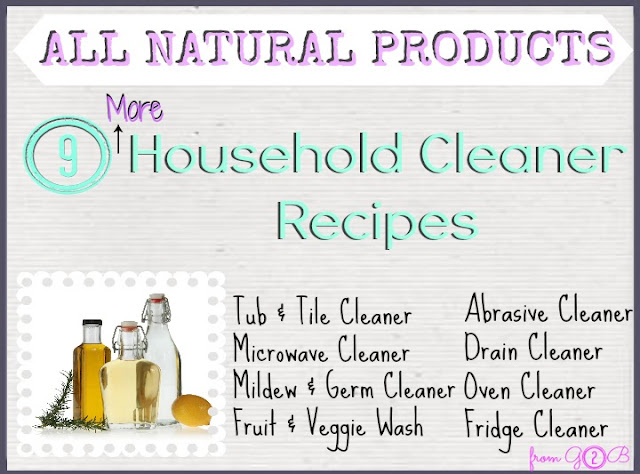
Homemade Cleaning Supply Recipes ▻ Part 2


I received a ton of hits on the homemade cleaning supplies and I'm stoked people are so interested! So today I'm posting additional recipes that people have asked for. As I previously mentioned here these are recipes I've either discovered for myself or collected off the Internet over the years.

I love making my own products for several reasons:
1) They're cost efficient.
2) I never run out because I keep all the basic supplies stocked up and they're always on hand to make another batch.
3) You know exactly what cleaning products you have in your home and they all ALL NATURAL & NON-TOXIC!
4)They work as well, if not better, as the "real" cleaning products.


All-Purpose Abrasive Cleaner
Liquid Castile Soap
2 tbsp. Baking Soda

Apply liquid soap until a foamy paste is formed.

All-Purpose Carpet Cleaner
1st- Vacuum...Then clean with:
3 cups Boiling Water mixed with
1 cup White Vinegar

Depending on degree of soiled carpet- either blot or scrub the mixture into the carpet
Air dry and vacuum again.

Drain Cleaner
1st-  Pour 1 cup of Baking Soda down your drain
2nd- Pour 1 cup of White Vinegar down the drain

Drain will FOAM- let sit for 5-10 minutes

3rd- Pour a gallon of BOILING WATER down the Drain

Refrigerator Cleaner
1 qt Warm Water
2 tbsp Baking Soda

Wipe down the inside of the fridge then rinse with a clean cloth.
 
Oven Cleaner

Wet the oven
Sprinkle Baking Soda Generously 

Let sit in the oven for 30 min and then scrub off.

Microwave Cleaner

2 cups of Water
1/2 cup White Vinegar

Heat in a microwave safe bowl for 3 minutes, then wipe down microwave.

Tub & Tile Cleaner

Apply White Vinegar to a Sponge
Use Baking Soda to Scour

Fruit & Vegetable Wash
1 cup Water

Small Spray Bottle
1 1/2 tbsp Baking Soda
1 1/2 tbsp Lemon Juice

Spray on produce, let sit, then rinse off.

Mildew & Germ Cleaner

Small Spray Bottle
2 parts Water
1 part Hydrogen Peroxide

Spray on mildew, let it sit and rinse off after 1 hr.


Don't miss my other posts for all your cleaning basics- 

right here:


And Here:

I hope these recipes make your lives easier and your homes cleaner! Have a happy day!

Follow on Bloglovin

 photo 2fc9bcc8-3007-4b83-a06b-544496708353.jpg