Showing posts with label Gift Idea. Show all posts

May 11, 2011

Picture Personalized Coasters

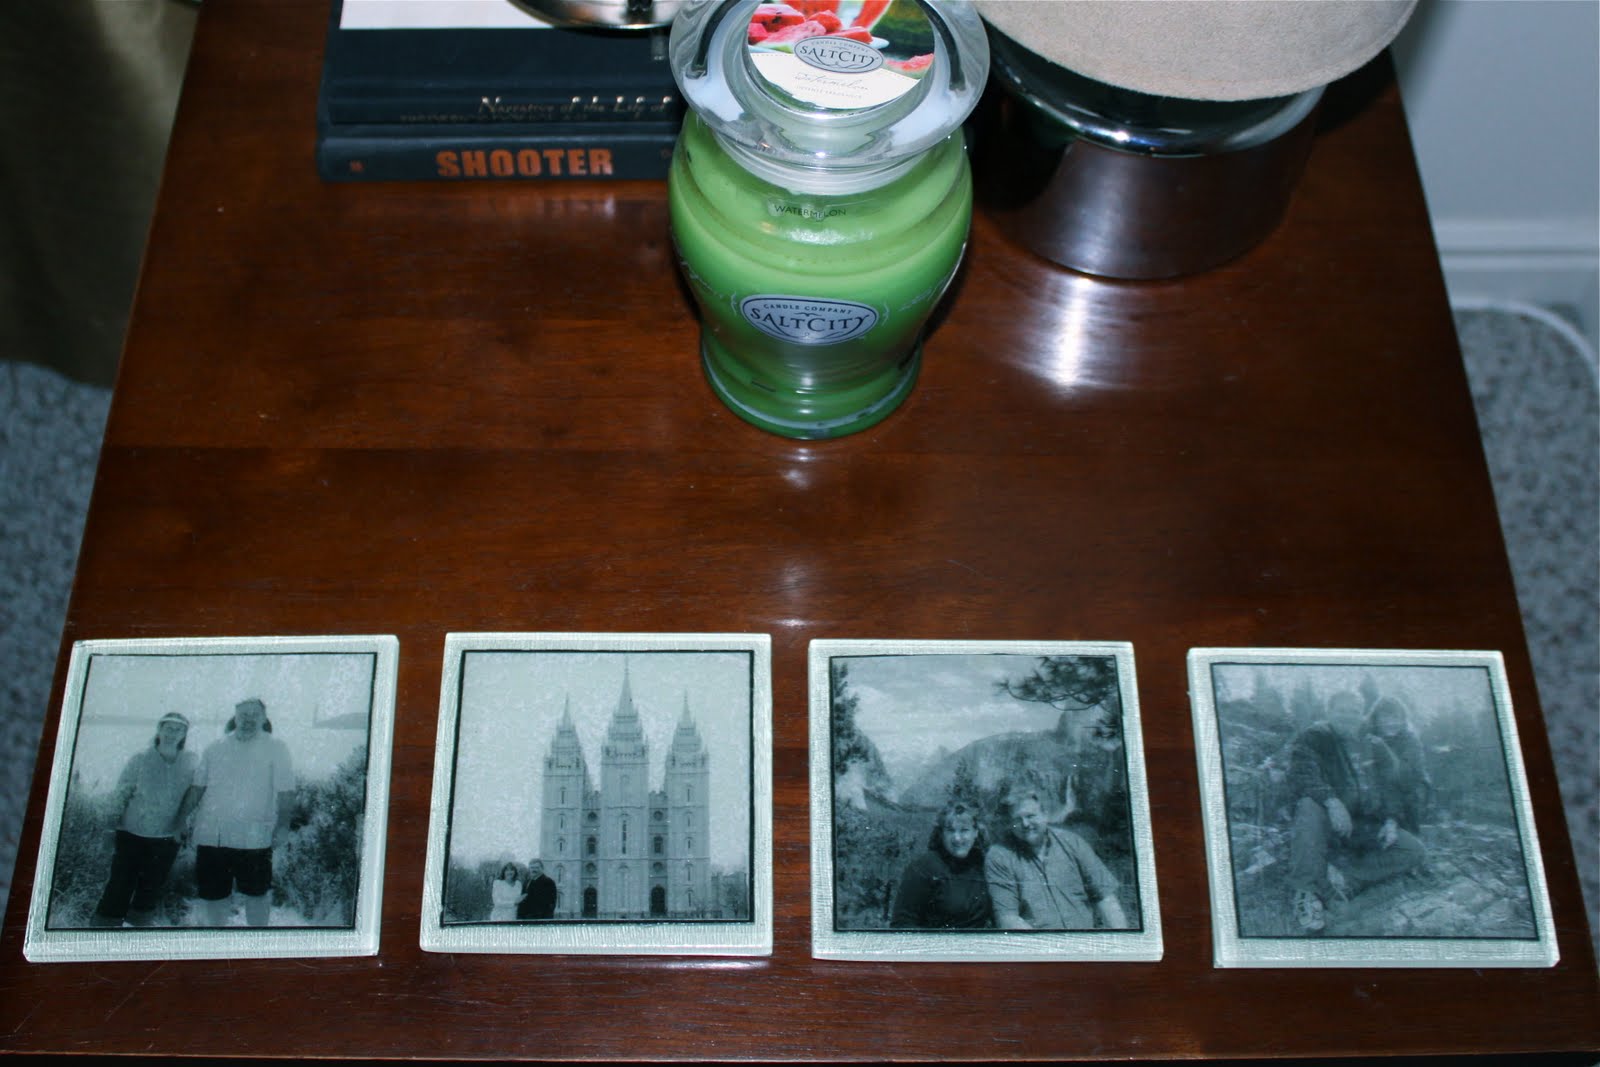
I keep a file on my computer of homemade gift ideas. Awhile back I came across these cuties on Chameleon Girls

I've been waiting for the perfect occasion and I found it. I thought they'd be a perfect thank you to my wonderful father and his wife for having us to Cali and graciously providing a family vacation. 

At Lowe's I decided on these gorgeous glass tiles.


I love the inspiration tissue paper but wanted a more personalized look and something to fit their aesthetic.
In the end I had my Pops send me a few of their favorite photos. I converted them to pdf and cropped them down to 4x4in. 
Then the tricky part- you want to print them on tissue paper so they will be very thin and look more a part of the tile. I taped tissue paper to a regular 8 1/2 x 11 sheet and stuck it in the printer that way.

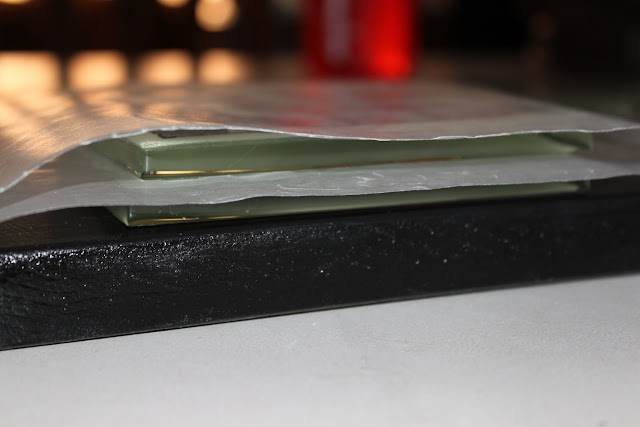
Cut them down to size and then modge podge them onto the tile. You don't want to apply modge podge to the back of the tissue, only to the tile. Wait to out it on the tile until
the tile looks dry and feels tacky.
Lay the tissue paper where you want it, then put a piece of wax paper on top and then rub out any bubbles. (I didn't really have many.)
After 15-20 minutes you can apply the second coat of modge podge.

When everything is thoroughly dry, I waited overnight, you can lacquer the tiles. You don't want to skip this step if you're planning on using the coasters because they aren't waterproof without it.
I used light grey felt on the bottom of mine- but you could use cork if you wanted to.

 I love being able to give a personalized gift-
and it's especially perfect for those people who are able to purchase the things they need/want!

Thanks for swinging by!

- Becca -
Cherished Treasures”=

Partying here this week and more specifically here and here.

April 26, 2011

Home Sewn Favors

I was doing the rounds at each and every craft and party store in my area and realized that party favors are pretty ridiculous in price.
I could pay $1 for 4 of these cute little organza bags or I could...


Well, I didn't know what I could do. See, I'm originally from Boston. My own mother's motto with anything having to do with crafts or sewing was "if a glue gun can't fix it than neither can I". 
Serious.
So, or rather sew, I knew making my own bags would be a heck of a lot cheaper and just as cute but I can't sew.

Well, Mom-in-Law Berger saved the day. We got some fabric with a 40% off coupon and used ribbon I had on hand and made these sweet babies.

It was actually sew (last time, I promise) easy that I probably could do it again on my own.


 Start by cutting strips of fabric-  these are approximately 3x5in.

See where my thumb is? Next you will sew to create the pocket where the drawstrings will be inserted. Hold the fabric so that the 3in side will be the height and 5 in side will be the width.


Sew across the top of fabric about one in from the top and then again across the top only about 1/2 in from the top.

Now you'll fold the fabric in half and sew the edges to secure the other two sides of the bag. Turn the bag inside out so the seems are on the inside.


You want to make two little cuts in the pocket you created for the draw strings and thread through a piece of ribbon. Tie it in a knot and then tie one through heading the opposite direction. This way you'll be able to pull it closed.

Side note- where can a person learn to sew these days, anyhow?

The overall cost was mostly for the candies inside the bag. Cheap Frugal project anyone with a sewing machine could do. Not only that you can customize it with cute ribbons or coordinating fabric.

As always, thanks for coming by!

- Becca -


I PARTY EVERYWHERE!
Tools are for Women TooChic on a Shoestring,  Tip Junkie,  At the Picket FenceShabby NestReasons to Skip the Housework, Simply Designing,  Funky Junk Interiors,  Nifty Thrifty Things, I Heart Nap TimeCreating Really Awesome Free ThingsPetite Hermine, Craft EnvyStories of A 2 Z,  Hope StudiosNew NostalgiaSugarbee CraftsAsk Anna Moseley, DIY By DesignPassionately ArtisticWomen Who Do It AllHouse of Hepworths, L Bratina, Beyond the Picket Fence, Shabby Chic CottageFire Flies and Jelly Beans, Its a Hodge Podge LifeJust a Girl BlogSimply Sweet Home Inspiring Creations Blog, On the Verge 6, Fingerprints on the FridgeWhipperberryRemodelaholicAll Thingz Related, Saturday Mornings,  Poppies at Play, The Girl Creative, Type A Decorating, At Home With K, Elements InteriorsSome what Simple and  Stuff and Nonsense.

April 22, 2011

Thrifty Gift Idea (Mother's Day/Visiting Teaching)

I received this plaque for my anniversary a few years ago. I decided to make 5x7 versions for my monthly visiting teaching handout as it's two of my girls' birthdays this month and the third gal is a mom and I will be seeing her right before mom's day- I thought the temple that is meaningful to each of them would be a perfect gift.

I started with a piece of scrap alder from Home Depot that costs me $1.01-yeah seriously! I had a pic of my happy face but switched phones and you'll just have to imagine it.

I had the guy there cut the scrap into 8 5x7 pieces. The sanded the crap out of it with 80 grit and then 220. It took the entire Nate Berkus show AND an episode of Dancing with the Stars to sand it to my liking.

 
Make LASER copies of whichever photo you want to use (inkjet prints will run). When I was looking for the free temple pics online I found that someone had done this idea before. If you go to The Idea Door you can find some variations of this as well as TONS of temple pdf files. I sized them down to 4x6 and put two to a page so it would cost less-it's 59 cents a page for color copies at Kinkos.

Then I did two coats of black craft paint. After it's super dry, you'll apply either glossy or matte modge podge (for paper) to the wood surface and then to the back of the picture- starting in the middle and working towards the edges.

The wood should look almost dry when you apply the picture to it. You'll want to press it onto the wood for 1-2 minutes and make sure no bubbles form.

 After at least 15 minutes you can do a second modge podge coat on top of the pic, this is where I had to be careful with the bubbling. Keep pressing down working from the center towards the edges- there are tools to do this, but fingers work fine.

Let the boards dry overnight, in the morning the modge podge may still feel tacky to the touch. You may then use a clear acrylic finish spray paint which fix that and make it look more professional.

Mesa, AZ Temple

Salt Lake City Temple

Laie Hawaii Temple

Although I chose a religious picture of the LDS temple because I wanted the message to be family oriented, i.e. "Families are Forever"-
you COULD do this with any print you want, a family photo or whatever.

You could also layer cute card stock or scrap book paper under the chosen picture.

For Z's and my moms we'll buy a stand to give as  part of the gift.
For the other women I'll just wrap a bow around it and call it good.


Thanks for dropping by!

- Becca -

I'M A PARTY ANIMAL!
Tools are for Women TooChic on a Shoestring,  Tip Junkie,  At the Picket FenceShabby NestReasons to Skip the Housework, Simply Designing,  Funky Junk Interiors,  Nifty Thrifty Things, I Heart Nap TimeCreating Really Awesome Free ThingsPetite Hermine, Craft EnvyStories of A 2 Z,  Hope StudiosNew NostalgiaSugarbee CraftsAsk Anna Moseley, DIY By DesignPassionately ArtisticWomen Who Do It AllHouse of Hepworths, L Bratina, Beyond the Picket Fence, Shabby Chic CottageFire Flies and Jelly Beans, Its a Hodge Podge LifeJust a Girl BlogSimply Sweet Home Inspiring Creations Blog, On the Verge 6, Fingerprints on the FridgeWhipperberryRemodelaholicAll Thingz Related, Saturday Mornings,  Poppies at Play, The Girl Creative, Type A Decorating, At Home With K, Elements InteriorsSome what SimpleTodays Creative Blog and  Stuff and Nonsense.

April 19, 2011

➷ 1$ Diaper Cake ➹

This was not the post I planned for today- I had spent hours on a project set to "debut" today but still need to take pics (it's been very rainy). My efforts were foiled when our baby HUGE FAT CAT threw up IN OUR BED last night. UGGH! No pics of the bedroom now-
THEN this morning I FAINTED! Like, what? Who does that? Now I am achey and feel sore and have to send out a less exciting back up post.

Anyhow, awhile back I mentioned that I was going to do a diaper cake. I'm working on the shower with a friend so we came together to decide on this idea for two reasons. One: she had the extra diapers of a style that wasn't working for her daughter. Two: I wanted to create balance for the table and was worried about not having enough height. 

I've shared my inspiration picture- and there are a ton to chose from. I mean the Internet is filled with ideas! I knew I wanted one more decorated and less "diapery" as I figured it would look more cohesive. We  used newborn diapers and did sort of two and a half tiers held together by a baby powder bottle. Each diaper is rolled and secured by clear (hair) rubber bands. We had planned to use wide ribbon but then had an idea to use card stock- which we still had plenty of. This way it would cover the diapers, provide a a nice smooth surface and we could return the ribbon.

We got the grass from Hobby Lobby at a 50% sale so it cost us a buck.
Diapers were some that my partner didn't like and wasn't gonna use- so they were upcycled.
Stickers and card stock were already purchased for the the pennant,
gift bag, and cupcake toppers.


Grand Total: 1 Buckaroo!

Thanks for reading!
- Becca - 

May be linked up at these awesome parties:
Tools are for Women TooChic on a Shoestring,  Tip Junkie,  At the Picket FenceShabby NestReasons to Skip the Housework, Simply Designing,  Funky Junk Interiors,  Nifty Thrifty Things, I Heart Nap TimeCreating Really Awesome Free ThingsPetite Hermine, Craft EnvyStories of A 2 Z,  Hope StudiosNew NostalgiaSugarbee CraftsAsk Anna Moseley, DIY By DesignPassionately ArtisticWomen Who Do It AllHouse of Hepworths, L Bratina, Beyond the Picket Fence, Shabby Chic CottageFire Flies and Jelly Beans, Its a Hodge Podge LifeJust a Girl BlogSimply Sweet Home Inspiring Creations Blog, On the Verge 6, Fingerprints on the FridgeWhipperberryRemodelaholicAll Thingz Related, Saturday Mornings,  Poppies at Play, The Girl Creative, Type A Decorating, At Home With K, Elements InteriorsSome what Simple and  Stuff and Nonsense.


April 7, 2011

Penchant for Pennants

I am making a pennant banner as a part of the decorations for the baby shower I throwing. When I was scouring the craft stores for a month looking for the best deals possible I found a cute book of scrapbooking paper for half off. It was already a pretty good deal at $10 but at half off I couldn't say no. It isn't specifically baby themed but that works for me. I wanted to make something with his name on it so that it could be hung in his nursery as a part of the decor.

Baby's name will be Gerret- so six letters. I chose four different patterns of paper. Two plain in shades of blue and two patterned for the top layer. The scrapbook paper is 12x12 and this allows me to do three triangles per sheet at 6 inches wide and 12 inches long. I'm using a regular old paper cutter to cut it cleanly. The top triangle I'm making 1 1/2 smaller in width and 2 inches shorter in length. I used scissors similar to pinking shears for a more decorative top triangle.

To do the letters I had to improvise. All of you super crafty people will turn to your cricket machines or whatever method you have for cutting out letters that look awesome. You could also do chipboard letters. 


For a couple of reasons I went old school on this, I mean super old school. I used a stencil and painted on the name.


I would have preferred to have the name cut out- but I though painting it would look cleaner than tracing the stencils and then cutting the letters out by hand.


 It was actually hard to find a paint that would cover those bold polka dots. In the end an oil paint worked the best. Thankfully I had a bunch of different options already so it was no trouble to try tons of options.


I expectantly ended up with little triangles scraps when I cut out the large ones. They measure about 2x6in.


I was able to use them to make a small pennant that I think I will use for the front of the table.


What a fun little bonus decoration for basically no extra work or effort. Love when that happens!

I was featured on 
 Simply Sweet Home!

I'm linked to Tater Tots and JelloStuff and NonsenseI heart Nap TimeCraft Envy, Funky Junk Interiors, Tip Junkie and Creation Corner!