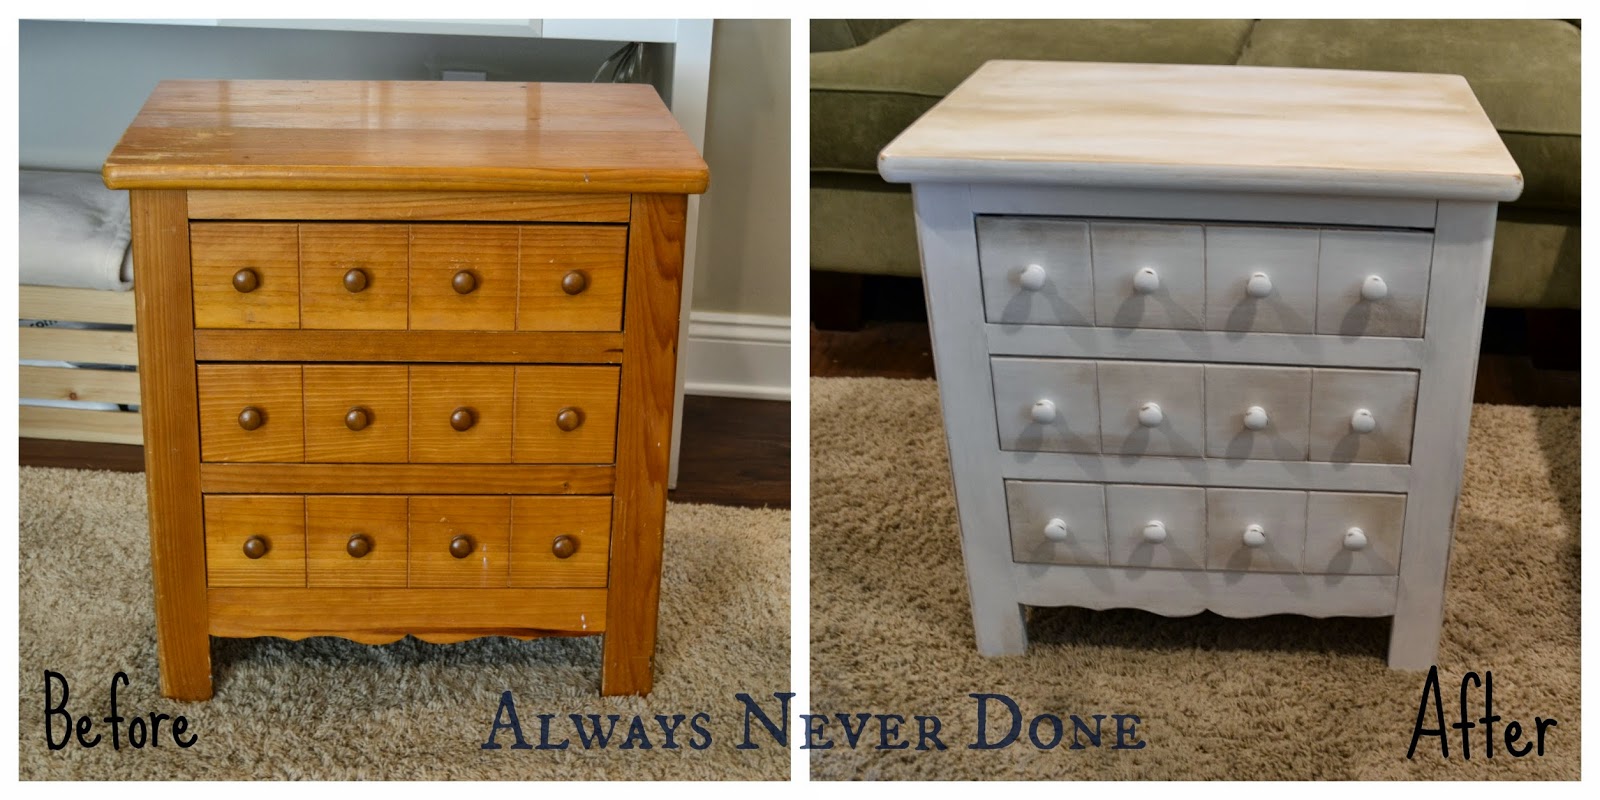
Welcome friends, it's Amy from Always Never Done, with my 3rd post here G2B. You can see my first post on DIY Milk Glass and my second post on rehabbing a Cloth Napkin Covered Stool. This month I am going to show you how to distress a table.
First you have to find a good piece that has a nice wood tone as a base. I have a great hook-up with a co-worker. She has a ton of furniture that she wants to get rid of...and I have first dibs on buying it from her! (Shout out to my girl Heather) It's a great friendship don't you think? This cutie pie below was right up my ally, scratches and all, I had to have it!
First you have to find a good piece that has a nice wood tone as a base. I have a great hook-up with a co-worker. She has a ton of furniture that she wants to get rid of...and I have first dibs on buying it from her! (Shout out to my girl Heather) It's a great friendship don't you think? This cutie pie below was right up my ally, scratches and all, I had to have it!

The first thing I had to tackle was that nasty split on the top. Not only was the wood separating, it was uneven. I wasn't quite sure how to tackle it, so I rummaged through my beautiful workshop, aka the garage, and found this stuff.
I squeezed the Stainable Wood Filler over the split and rubbed it into the crevice with my finger. It was sort of rough and "sand-papery" when I put it on, but it sanded nice and smooth. I had to put on 2 coats to make the split seamless. I also used wood glue and adjustable clamps on either end to bond the pieces together to get rid of the unevenness.

After that dried and was sanded down to perfection, well almost perfection, I lightly sanded the whole table to get the shiny finish off with a medium grade sanding block. Then sanded again with a fine sand paper. I wiped off the residual dust with a damp paper towel.
Now for paint!! I chose Annie Sloan Chalk Paint in Pure White. I watered it down a little bit to thin it so it wouldn't look too heavy. After 3 coats of that, I sanded the corners and random areas to expose the wood underneath to give it a naturally worn look.

I then brushed Annie Sloan Clear wax over the whole thing, rubbed it in with a clean lint free cloth and then took Annie Sloan Dark wax and brushed that over the worn areas where the wood was showing through to darken them up a bit to add a little more character. I again buffed the dark wax till it was shiny and smooth.
Take a look at the top. Oh what is that you see? Oh yes, a nice smooth even top. Bow to the left, bow to the right, thank you very much! Looks good, huh?!?
Oh, and I can't forget the knobs. I lightly sanded those and spray painted them with a Rustoleum white paint until they were completely covered. I then sanded some of the edges so that the wood came through and put a coat of clear wax on them. DONE!!!
So that's how you distress a cute little side table with some chalk paint and wax. This project went pretty quickly because the paint dries super quick and the wax can be buffed immediately. The most labor intensive part of this project was those 12 little knobs!!! But it was so worth it! So next time you want to paint a piece of furniture, try distressing it! I think you will love the outcome just as much as I did:)


