Hey guys! This week's project idea comes from a high-end resort designer. She wanted a much wider, 12' planks for her design, but also wanted the warmth of wood. In the end, she found a wood plank alternative that save money and offers a wide range of customizability.
Materials
- Alder (seen here), Birch, Maple, Beech Plywood- from Home Depot, Lowes, etc.
- Denatured Alcohol
- Weatherwood's Reclamation Stain
- Sponge Brush or Spray Gun
- Optional: Weatherwood Maintenance Oil, Weatherwood Varnish
Directions
WALL PLANKS:
To achieve this low cost alternative to more expensive wood wall options, my favorite tutorial comes from Little Red Brick House [link.] Sarah does a great job walking you through the materials needed and how to turn plywood into "planks."
To achieve this low cost alternative to more expensive wood wall options, my favorite tutorial comes from Little Red Brick House [link.] Sarah does a great job walking you through the materials needed and how to turn plywood into "planks."
Being able to customize the size and spacing of the planks is major for me with this knock off plywood option. Our inspiration room designer chose to do 1 ft. planks, but 8" looks classic and expensive, too. Also, spacing them a little ways apart, would look more traditional farmhouse if that's what you're going for.
The other trick this designer used for this was to use "ALDER" plywood, rather than the cheapest wood, maybe pine, she could find. By doing that, she is able to achieve a gorgeous, lux, high end look on the dime.
WALL COLOR:
1.] SAND (SORT OF)
Normally, I'd say you should sand wood and with 80 grit sandpaper, but for projects that have intricate carving you'll want to use something else. You can purchase denatured alcohol, it's inexpensive and faster than sanding. Apply it like you would stain, with a spray gun or paint brush. Make sure to the wood the day before you plan to stain, so it can completely dry.
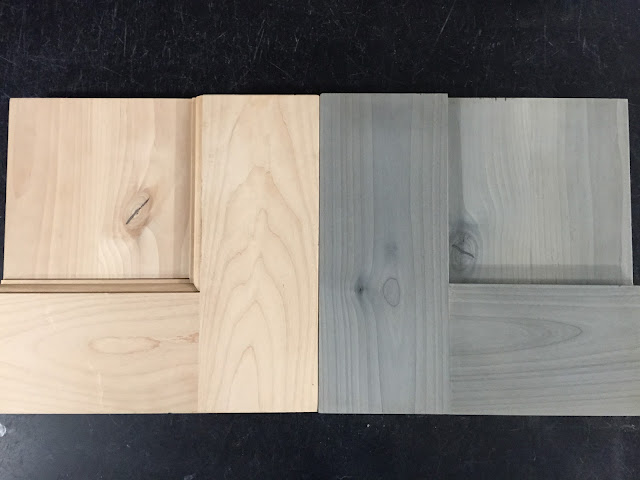
Once you're wood is dry, which takes about 30 minutes, you're ready to move to the next step. You will see the before and after transformation of raw alder to Reclamation stained below.
2.] STAIN:
In these photos and videos I used alder. But you could use alder, maple, birch or beech and get these same driftwood results. This is a trick for raw wood. If you want a pure driftwood gray, you should use Reclamation. If you want a brown with brown in it, use Salvage.
Using a wide brush, roller, or sponge brush, apply heavy coat of stain. Like in the above video, the wood will absorb the stain as it dries. The color will change from raw wood to stained. The best method for application, sprayer or brush, depends on your project. But both will work. You can with stain with a sprayer, see below video:
Or you can use a brush- the video below. The application is very simple. Just apply, make sure the wood is really wet and don't wipe the stain back off.
Allow the wood to dry. It's so much easier, and beautiful, than traditional wood stains. You'll get this beautiful light gray and all that gorgeous wood grain will be visible.
3.] ADJUST COLOR: OPTIONAL
Then you want to decide if you like the color as is, in which case just seal it with Weatherwood Varnish. If you want to lighten it, you'll want to use Weatherwood's WHITE Maintenance Oil Topcoat, LEFT. However, if you want to darken it, and enhance the warmth of the wood tone, then use Weatherwood's CLEAR Maintenance Oil Topcoat (RIGHT).
Then you want to decide if you like the color as is, in which case just seal it with Weatherwood Varnish. If you want to lighten it, you'll want to use Weatherwood's WHITE Maintenance Oil Topcoat, LEFT. However, if you want to darken it, and enhance the warmth of the wood tone, then use Weatherwood's CLEAR Maintenance Oil Topcoat (RIGHT).
4.] PROTECT
Real barnwood walls cannot be protected with a topcoat, but these can. Determine if you want to add a topcoat, the right one would be Weatherwood Varnish.
My favorite part of this low cost wood wall alternative, is that a high end designer came up with the design. Serendipity is the best designer, I think. I die for this color on the wall. It's just perfect and to get it at a great deal to like winning the jackpot.
To Achieve a lighter version, here's a great post on DIY Perfect Driftwood Gray.
Questions, comments? Leave'em below!
-xoxo-


