I hope you had a great week. We have had terrible storms here and I barely have Internet because of it, but thankfully I was able to squeak this post out. This barnwood wall is one of our most popular Weatherwood looks, we have had everyone from mansions, to restaurants, stores and DIYers create the look. The best part- I will show you it's a very simple project and your materials will be fairly minimal investment.
Materials
- Alder Shiplap or Tongue & Groove Planks
- Weatherwood's Reclamation Stain
- Spray Gun
- Brad Head Nail Gun
First, determine how much material you will need. The stain covers 350 sq. ft per gallon and buying the wood is a simple math calculation, depending on the size of your shiplap. There are several online calculators that will help with this. To obtain alder shiplap you will want to call around to local hardwood mills. It will be cheaper of you purchase the wood and then line of the milling, but if this is over your head, just buy the wood cut and ready to go.
Directions
1. This project used 4" tongue and groove panels, but you could do 5" or 6"too. We used a paint sprayer to spray the wood on site, since it's safe for the ground. We laid out the planks about 5 at a time and applied the stain using a gravity drop sprayer. Make sure to strain the wood stain first and then apply it using broad, overlapping strokes.
2. You can handle the wood when it's wet. Just prop it up to get good air flow and you can see, the wood is turning silver as it dries. We also stained the door, also made of alder, so it would all match.


3. To install, you need a nail gun. Begin at one side of your room, leaving about 1/2 inch space against the wall for expansion. You'll want to secure a board by shooting a nail at the tongue of the joint, at top and bottom. Shoot the nails in at a slight angle, so they can't work back out of the wood. Make sure the nails go in flush against the wood, so the next board can easily side into place. Continue to work across, making sure the wood is parallel every couple of boards or so.
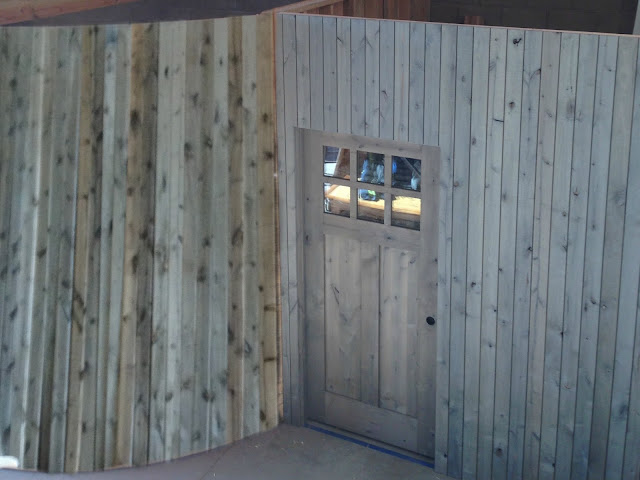
I like how this photo shows the contrast of completely dry wood, on the right, versus wood that's still damp on the left. You can see that it becomes this lovely shade of silvery gray when dry. They are still installing flooring and light fixtures- but I'll share an after, after photo once it's totally done.
And finally, my favorite photo. There's the nearly finished space. Isn't it lovely? The best part, it's so simple! They decided not to use a topcoat because the wood is in a commercial space and will be replaced every other year or so. But in your own home, you would want to apply a wood sealer after the wall was in place. You could use the spray gun and apply it right in place.


