Dustin and Whitney run a fun blog,
The Rooster and The Hen-it's filled to the brim with ideas about home and decor DIY projects. They've agreed to share their
master bedroom transformation today- and even share how they made money on the project and got a new looking room along the way!
✧✧✧✧✧
As much as we’ve enjoyed the
master bedroom makeover ride, I think it’s safe to say that we’re glad to have it finally done. I guess I shouldn’t use the word done knowing my wife, since she’ll continually tweak and improve on the design - but I’m guessing the current layout will be set at least for a while since we both really like the bright beachy feel. In fact, if you’ll remember our original mood board, airy and relaxed was our goal.

Let’s take a walk down memory lane to point out all the projects that made this room come together, complete with costs and maybe a thing or two we learned along the way. Psst, hover over some of the pictures to see the before shot.
Down to Business
We started out by gutting the room so we could paint. We actually sold the bed frame, night stands, and the dresser online since we didn’t have another place to put them and we’d be able to use the cash from the sale for our makeover.
Cost: We made $425 Whoot!
Beachy Blue
Our next project had Whitney
mixing up our own paint - originally trying for Martha Stewart’s Spring Melt, we ended up going for a slightly different version of the color. We didn’t worry so much about taping off the room since we planned on taking care of baseboards in the next step.
 Cost: Roughly $5 in paint and supplies since we used what we had on hand. This project would probably set you back $25 if you were to head to the store to purchase the paint.
Trimmin’ it Up
Since we had purchased new
moulding and baseboards for the rest of the house when we moved in, we figured that now would be the best time to finally change out the trim in the master bedroom. We came up with an interesting way to get that finished contractor look, and minimize having to use a lot of tape to get clean lines.

Cost: The baseboard cost $36 and the door and window trim set us back $20. We already had this on hand from a previous project so it didn’t feel like we had spent anything here, but we’re counting the cost anyway.
DIY Pallet Headboard
We channeled our inner woodsman by dicing and splicing up pallets for the
pallet headboard. We feel pretty cool that so many sites including
Miss Mustard Seed gushed over it - but even had that not happened, we still love it.

Cost: While the pallets were free, I did have to buy new blades for the sawzall for about $5 and used about $3 in finishing nails.
 Seashell Art
Fresh off a trip to sunny San Diego had us missing the beach. Whitney put the
shells and sand dollars to good use by finding a creative way to display them.
Cost: We re-purposed an old frame and dressed up some seashells with just a bit of paint and rope, so we’re gonna call this one pretty much a freebie.
Ballard Designs Knockoff Chair
We were able to get a $500 look in the room for a fraction of the cost
with this furniture paint and re-upholstery job. We used the fabric
inspired by Ballard Designs and a bit of trim from Hobby Lobby to make
it all happen. Check out all of that action
here.

Cost: Chairs came out to be $10 for the pair at a yard sale. We couldn’t have used more than $1 in paint and primer we already had. The biggest expense was the $15 in fabric and the $5 in trim. At $31 we thought it was fantastic deal.
Pallet Mirror
With some pallets left over from the pallet headboard and a mirror that came as part of a new dresser we picked up at one of the last garage sales of the season, we created a
pallet mirror to hang over the
faux fireplace which we had moved from downstairs to the master bedroom.

Cost: Once again the pallets came free thanks to Whitney making a plea to a couple local merchants and we’ll allocate $2 out of the $20 we spent on the dresser toward the cost of the mirror. The contractor’s glue from Home Depot was $3.
A Duvet Cover...Again
We changed up the old
duvet cover with goldish-green light weight faux suede fabric. It added the punch of color we needed. Whitney added a dark grey bed-skirt she found at Target to help complete the look.
 Costs: The bed turned out to be the most expensive project of the room with the fabric costing $30 and the grey bed-skirt $27.
 Canvas Art Makeover
One of my favorite projects was Whitney’s transformation of the outdated
canvas art we picked up and turned them into pieces inspired by Ballard Designs.
Costs: The canvas art pieces totaled $.10 and since she used good -ole house paint ($.50 worth), this art was nearly free too.
DIY Drapes, Finials, and Rope Tiebacks
We still laugh about the lady serving
mimosas at a yard sale, but nothing makes us more happy then saving money, which is exactly what we did by making our own
drapes,
finials, and rope tiebacks. I just know we’ll be painting these curtains in the future, stay tuned.

Costs: The curtain fabric was only $2, but the rod we picked up at Hobby Lobby was $22 after a 40% off coupon. The finials were free since we re-puprosed them, and the rope tiebacks were made from the largest natural rope one can buy from Lowe’s at $.69/ft ($6.00).
That Gold Stuff
Not everyone has jumped on the gold train, but it fits in so well with the new master room that we just had to have it as an accent. Our main gold piece is this old
gold pendant ball light that dresses up the corner.
 Costs: Once of the best garage sell finds of the summer at only $4 and a smidge of gold spray paint to cover the cord.
Pillow Talk
Whitney’s obsession with pillows paid off in a big way with our
DIY pillows. We saved on the pillows themselves by reusing ones that we had around.
 Costs: We’re not counting the pillows themselves since we got them so long ago, but we did end up using about $20 in fabric from our favorite stores.
Smelly Night Stands
My sacrifice for not breathing from San Diego until we got back home was worth the resuscitation efforts with our gold and cream
night stands. We definitely learned that painting in cold weather is not advised, but we were able to fix them up and transform them into just the thing to go next to the headboard.
 Costs: We bargained with the seller of these tables getting her down to $8 for the set on account of the broken handle which we easily fixed. We won’t bother to count the paint on this one since it was minimal.
DIY Drum Shades and Carboy Lamps
We delved into the world of lamp making by not only figuring our how to wire a carboy jar, but also how to turn some very ugly crafting hoops into a
drum shade that would have cost us a chunk of change at the store. We’re still a little impressed with ourselves.
 Costs: The carboys and craft hoops were a total of $1, while the combination of burlap and interfacing came to $8.
We originally had a budget of $50, but later increased it to $100. We’re pretty cheap, but I think we shot way too low on this one. Once we passed that mark, we figured the extra cost would be worth getting the right look, and we’re glad we did. All in all, here’s how we came out on the master bedroom makeover:
Paint and Supplies: $17
Furniture: $18
Trim work: $56
Accessories: $61.10
Fabric: $80
Total cost: $232.10
Total cost after furniture sale: We made $192.90!

Wow, what an upgrade, especially to find out we actually made money on redesigning our entire room. We both agree that the new room is so much better than what it was before, but what do YOU think?
✧✧✧✧✧
Oh maaaan! Do I ever want that faux fireplace!! From the moment I saw Dustin and Whit's I knew I needed my own! It's one of the main items I search the garage sales for! I super adore the stacked wood inside, too! I know all of you are crushing on the floor to ceiling pallet headboard! Drama- with a rustic vibe- I love the stain variations, too cool!
While you over at the
Rooster and the Hen saying hi- make sure you check out their awesome
kitchen reno, too!! I want to paint my cabinets so badly- *jealous!!


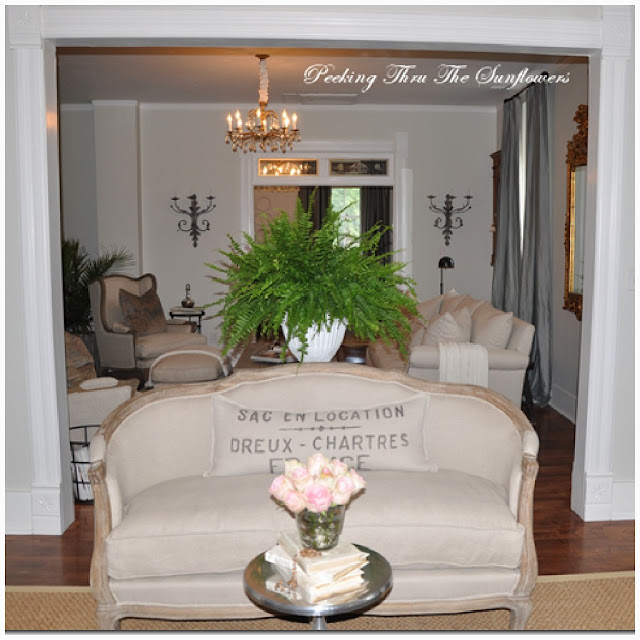
 Notice her collection of canes in the antique galvanized container? Such a beautiful space- I love the color of this petite sofa and chair.


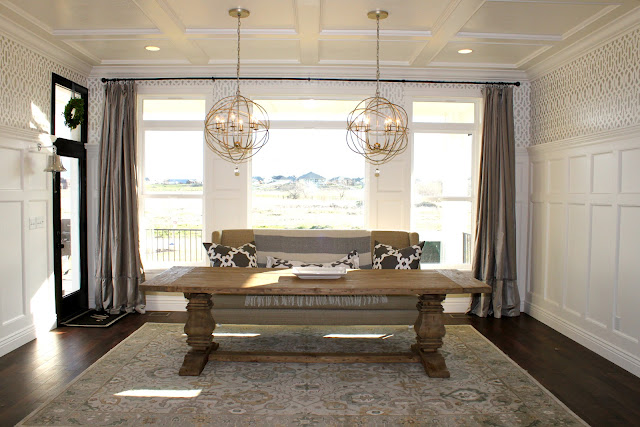
 You guys! Just look at this gorgeous space!


 Des is one talented lady to compose such a beautiful space. I love all these details.


 Here's a couple of posts about her room- the


